Ad-Hoc Commands Overview
In this lesson we’ll be taking a look at Ansible Ad-Hoc commands and they can be used to perform simple tasks with Ansible.
Overview
Ad-Hoc commands are the most basic form of automation achieved using Ansible. They are one line commands used to perform a specific task.
We might use ad hoc Ansible commands when we want to complete something really quick, but don’t want to save it for later. This could be a simple
show ip interface brief command on our devices.
Ad hoc commands are great when you’re learning Ansible for the first time. They allow us to take advantage of the power Ansible offers, without the need to create playbooks.
Unfortunately, the downside of ad hoc commands is that we can only have three parameters that can change:
Topology

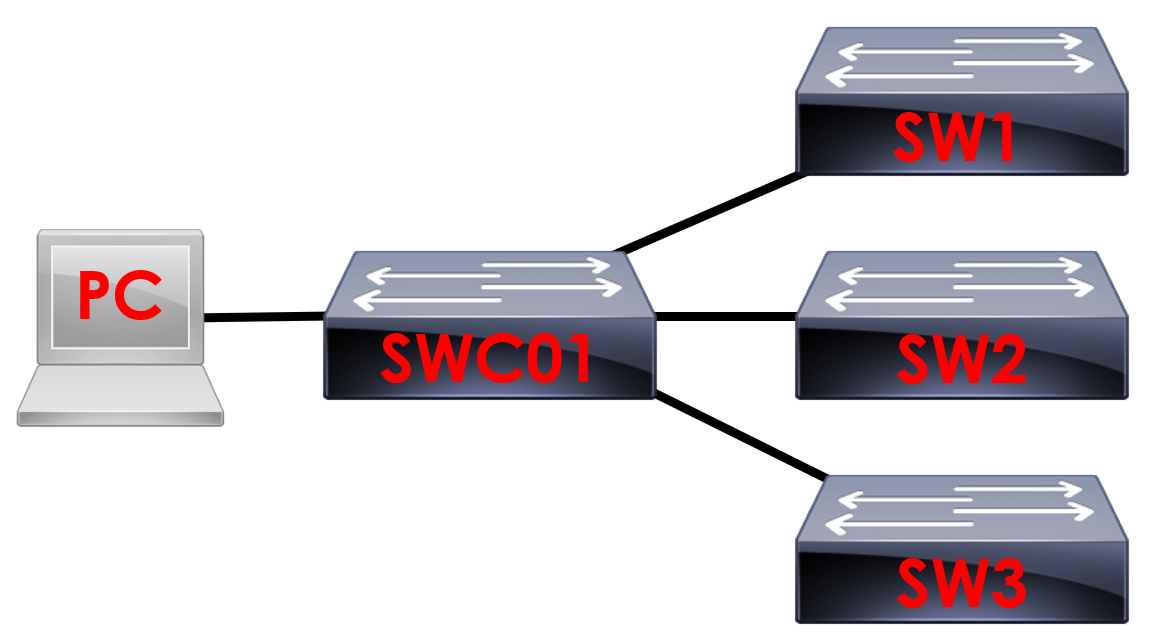
Let’s remind ourselves with the topology we’ll be using.
We’ll be using the example above to help us understand Ansible. We’ve got 3 access switches (SW1, SW2 and SW3) connected to our core switch (SWC01). From here we then have our PC connected to SWC01 running Ansible.
Basic Ad Hoc Commands
Let’s start by using some basic ad hoc commands against our topology.
To keep things simple during this lesson we’ll be using the raw Ansible module. The raw module is used to execute low-down and dirty SSH commands. It’ll provide you a fantastic insight in how ad hoc commands work within Ansible.
Show Uptime
We’ll start by checking the uptime on our devices using the show version | include uptime command.
To get a feel for Ansible, let’s start by running our commands against the core switch.
root@ANSIBLE:/etc/ansible/CiscoAnsible#
ansible CORE -m raw -a “show version | include uptime” -u Ansible -k
So that we understand what we’re running, let’s break down the command:
CORE = This is the group within our hosts file we want to execute commands against. Remember, the name needs to be case sensitive.
-m = Indicates to Ansible that we want to specify a module to run.
raw
= This is the name of the module we’re using to execute the Cisco command.
-a = Indicates that we want to present an argument (command) for Ansible to run.
“show version | include uptime”
= This is the command Ansible is going to run on our devices and export to the console. We need to enter it in brackets so that Ansible knows where the command starts and ends.
-u Ansible = As we’re not specifying a username to use in the hosts file, we need to tell Ansible to use the username; Ansible.
-k = Again, as we’re not specifying a password in the hosts file, we need to use -k to prompt for a password when running the ad hoc command.
root@ANSIBLE:/etc/ansible/CiscoAnsible# ansible CORE -m raw -a “show version | include uptime” -u Ansible -k
SSH password:
When we run the command, we’ll be promoted to enter the password for the Ansible user account. This is because we’ve specified the -k argument.
SWC01 | CHANGED | rc=0 >>
SWC01 uptime is 42 minutes.
Shared connection to 192.168.10.254 closed.
Our Ansible host then connects to SWC01 using SSH, runs the command and exports the output to our Ansible console. We can see that SWC01 has been online for 42 minutes
.
This is great, however we could SSH to the switch ourselves and gather the information. Let’s run the same command against our access switches.
Export Configuration
Now we understand the concept of how ad hoc Ansible commands work, let’s take a look at another example.
This time, we’ll export the running-configuration from our devices to a text file.
root@ANSIBLE:/etc/ansible/CiscoAnsible# ansible CORE -m raw -a “show run” -u Ansible -k > SWC01.txt
SSH password:
Our command is similar to last time, however we’ve made two amendments.
First of all, we’ve changed the argument/command we want Ansible to run. This time Ansible will run the
show run command.
In addition to this, we’ll use the > argument to export the output. We need to provide a file for where we want the output stored by following this with
SWC01.txt.
Again, we need to enter the SSH password for our Ansible account.
root@ANSIBLE:/etc/ansible/CiscoAnsible# ansible CORE -m raw -a “show run” -u Ansible -k > SWC01.txt
SSH password:
root@ANSIBLE:/etc/ansible/CiscoAnsible#
Ansible then connects to SWC01 (the only device in our CORE group) using SSH and runs the show run command.
You’ll notice this time however that no output has been exported to the console. Instead, it’s copied the out to
SWC01.txt.
root@ANSIBLE:/etc/ansible/CiscoAnsible#
ls
ansible.cfg hosts SWC01.txt
We can verify that Ansible has saved the output from our device to SWC01.txt using the ls command.
Along with our Ansible files we can now see the running-configuration from SWC01 saved as
SWC01.txt.
root@ANSIBLE:/etc/ansible/CiscoAnsible# cat SWC01.txt
To view the file we can run cat SWC01.txt to show the configuration file.
Write Memory
We’ll take a look at one more example before we move on. Let’s imagine we want to quickly save our running-configuration to flash on our access switches.
root@ANSIBLE:/etc/ansible/CiscoAnsible# ansible
ACCESS
-m raw -a “write mem”
-u Ansible -k
SSH password:
This time we’ll execute the command against devices in our ACCESS group. In addition to this, we’ll change our argument to run
write mem on our devices.
Again, we need to enter the
SSH password for our Ansible account.
SW1 | CHANGED | rc=0 >>
Building configuration…
[OK]Shared connection to 192.168.10.251 closed.
SW2 | CHANGED | rc=0 >>
Building configuration…
[OK]Shared connection to 192.168.10.252 closed.
SW3 | CHANGED | rc=0 >>
Building configuration…
[OK]Shared connection to 192.168.10.253 closed.
Ansible then reports back that the command has been ran on our devices and the configuration has been successfully saved to flash memory.