Out of Box RF Profile
When new APs are connected to the network awaiting configuration, they have the potential to cause havoc with our existing wireless environment. In this lesson, we’ll be taking a look at how using the ‘ Out of Box‘ feature within our Cisco WLC can resolve this.
Exam Topic
2.3 Design radio management
2.3.a RRM
Video Overview
Out of Box RF Profile Overview
By default, when additional APs are being added to the network, their antennas will be broadcasting within the RF environment. This in turn can have a detrimental impact on our existing wireless environment.
Usually, when deploying APs, we can deploy them in one of two ways;
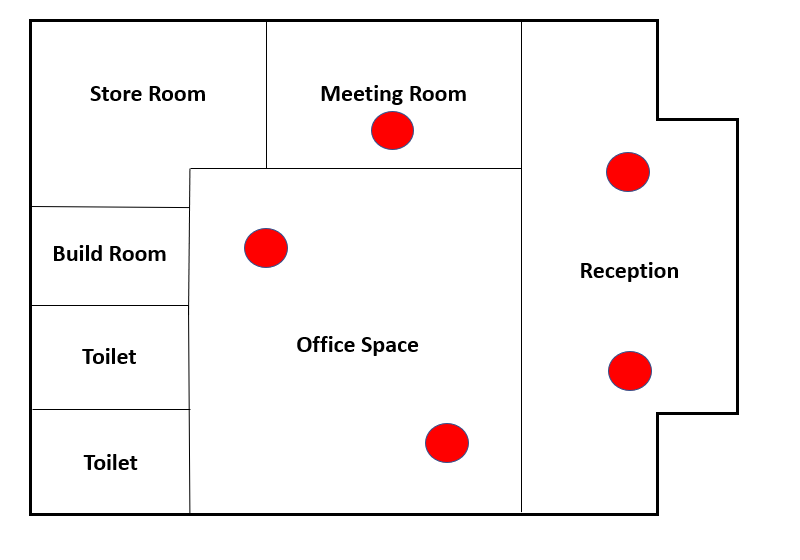
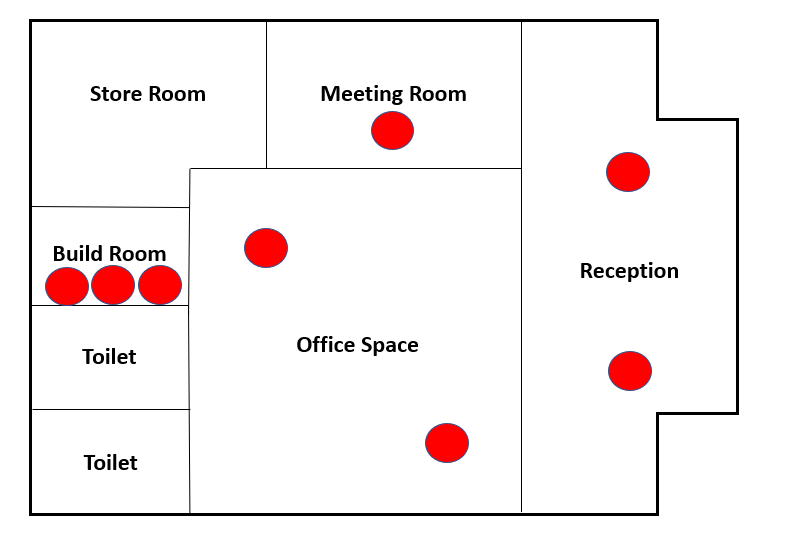
Let’s imagine we’ve got an office environment with five APs installed. Within the office we have a build room for APs to be built for remote locations.
Every time APs are unboxed and powered on for the first time, their radios will automatically be enabled. This, in turn, has the potential to cause havoc with the existing RF environment.
For example, we might be configuring three new APs for a remote location in the build room. Once powered on, t here will suddenly be an additional three APs within the RF space. Other APs within the area would then have to compute the impact and change their radio parameters accordingly.
Thankfully, we have the ability to automatically disable radio interfaces on new lightweight APs that join our controller. This is achieved using the feature known as Out of Box.
The feature works by moving new APs associating to the controller to a new default AP Group. The AP Group is called Out-Of-Box. This AP group is then used by default for new APs, instead of the default-group AP Group.
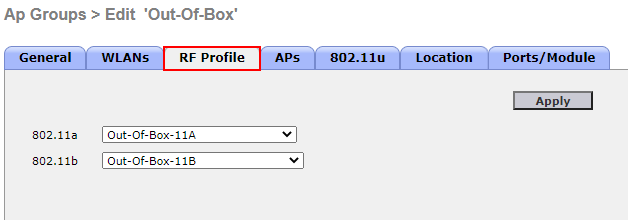
Within the AP Group, a new RF profile is assigned to our 2.4GHz and 5GHz radios;
You might be thinking, what’s wrong with the default-group AP group? The downside of this group is that we cannot apply RF profiles to it.
On the flip side, if we take a look at the Out-Of-Box AP group that we’ll look at later in the lesson, we have the option to apply an RF Profile.
Configuration
Now that we’ve got a better understanding of the Cisco Out of Box feature, let’s look at how we configure it.
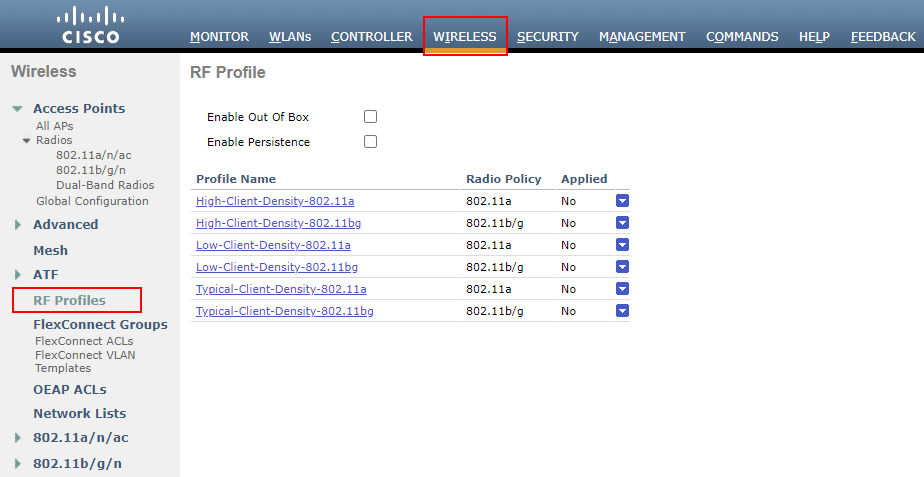
1. Navigate to RF Profiles Configuration
The Out of Box feature is located within the RF profile configuration. We can access this by navigating to:
WIRELESS > RF Profiles
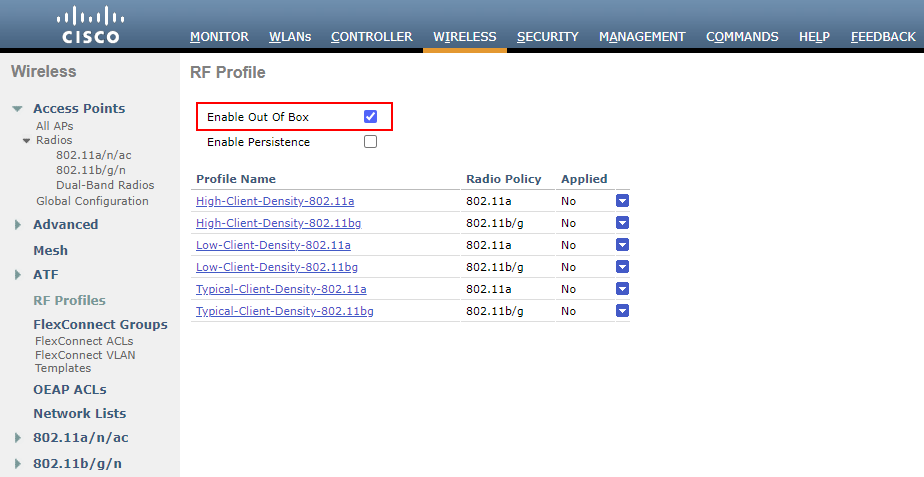
2. Enable Out of Box
We can then enable the feature by enabling the ‘Enable Out of Box‘ checkbox. From here, we’ll then apply the configuration.
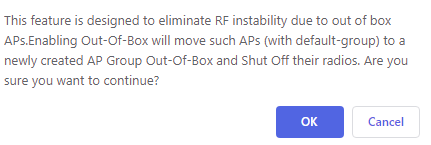
Once enabled, we’ll be prompted with a message warning us that APs currently associated to default-group will be disabled.
Verification
Now that we’ve configured the Out of Box feature, lets confirm that the configuration is working as required.
1. Confirm the Out of Box RF Profiles have been created
Once the setting has been enabled, we should see that we have two new RF profiles; Out-Of-Bo-11A and Out-Of-Box-11B.
As before, the RF Profiles can be viewed by navigating to;
WIRELESS > RF Profiles

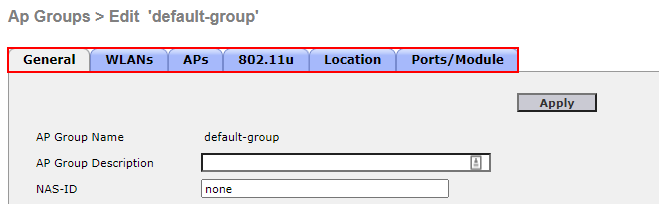
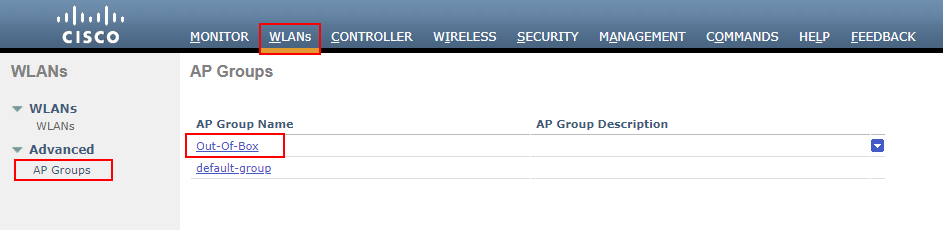
2. Confirm the Out of Box AP Group has been created
In addition to the RF Profiles that are created, a new AP Group is created name Out-Of-Box.
The AP Group can be viewed by navigating to;
WLANS > ADVANCED > AP Groups
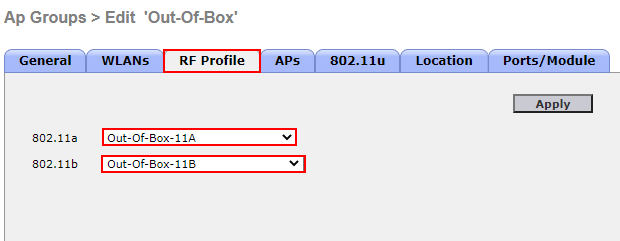
If we go into our Out-Of-Box AP Group and then the RF Profile tab, we can see that our new RF profiles have automatically been applied.
3. Associate a new AP to WLC
To test everything is working as required, I’ve associated a new AP to our WLC. New APs that join our controller from now on should now be placed in the Out-Of-Box AP group and the radios within the AP disabled.
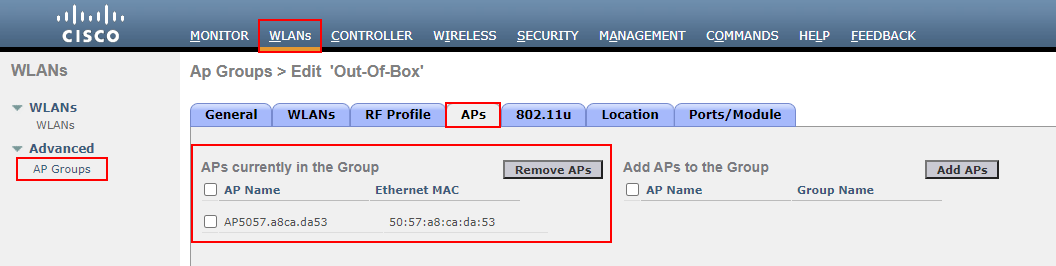
Once the new AP is associated, we’ll navigate to our Out of Box AP Group and navigate to the APs tab. Here we can see our new AP automatically associated to the AP Group.
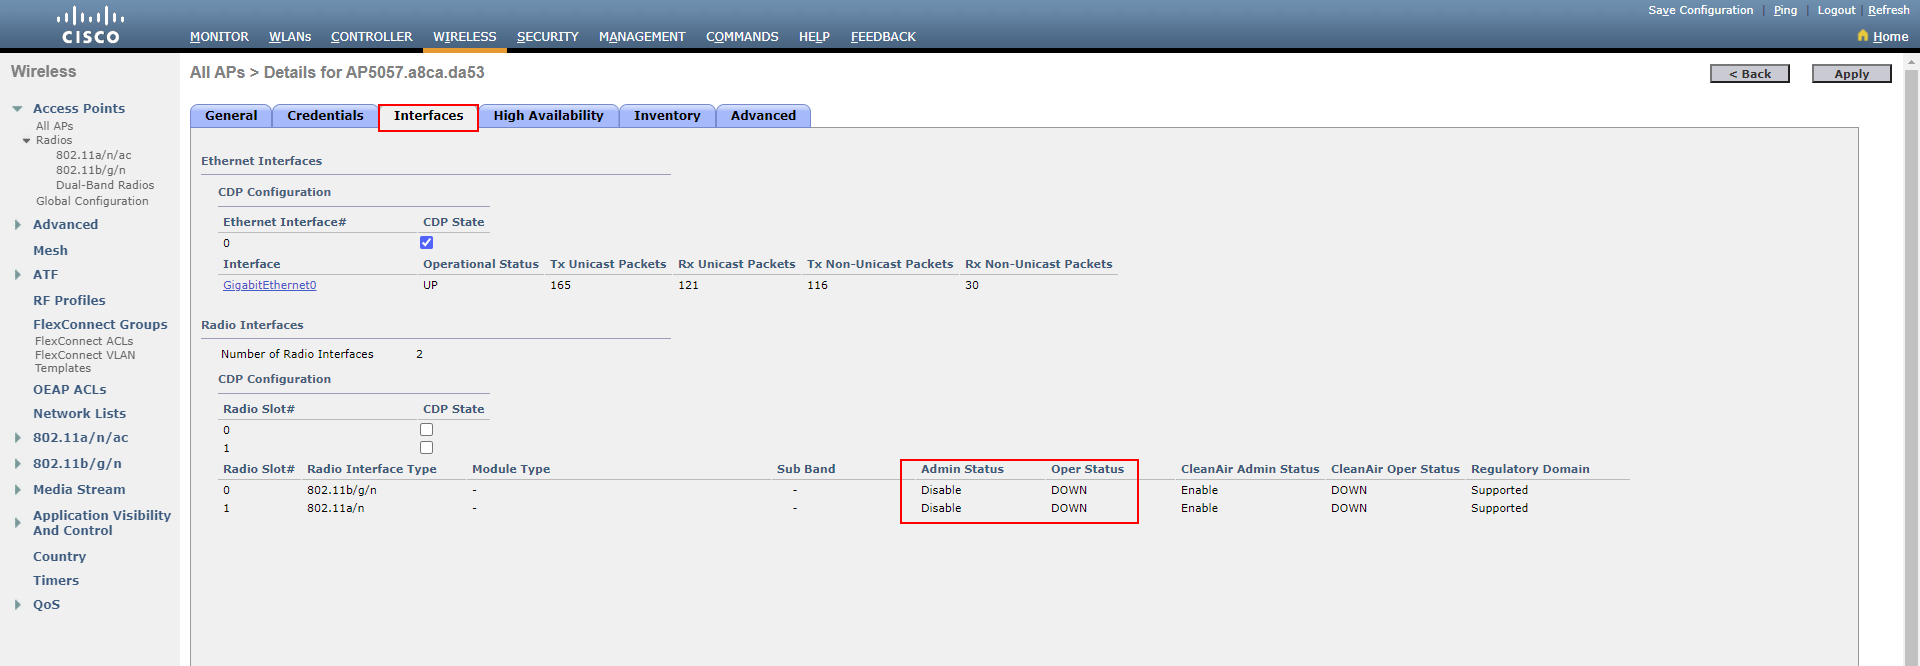
Our radios within the new AP associated should now be disabled. Let’s check this by navigating to our APs associated to our controller.
WIRELESS > Access Points > All APs
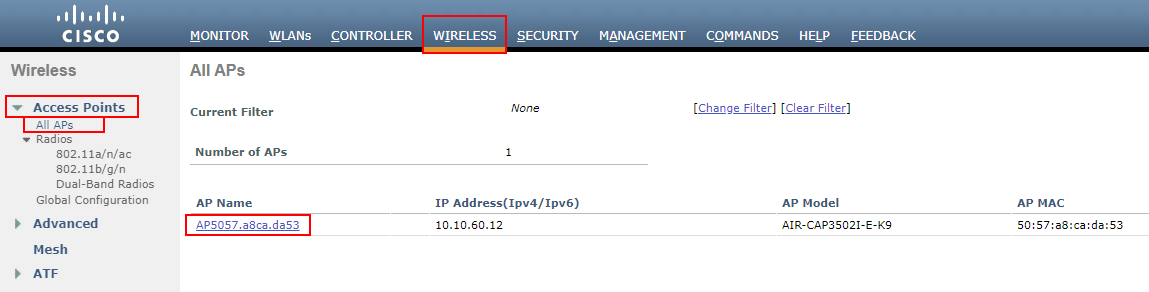
We’ll then go into our AP that’s just associated to the controller; AP5057.a8ca.da53. If we then navigate to the Interfaces tab, we can see the status of both radios. We can see here that both 2.4GHz and 5GHz radios are automatically disabled.