Standard Access Control Lists (ACLs)
In this lesson we’re going to be taking a look at Standard Access Control Lists (ACLs). We’ll be discussing how ACLs operate, uses cases and the modes available on Cisco IOS devices.
Exam Topic
5.0 Security
5.2 Configure and verify infrastructure security features
5.2.a ACLs
Overview
Standard ACLs use only the source IP address to filter network traffic. We have no ability to filter traffic using any other method.
Because of this, the entire protocol suite is permitted, as long as the traffic matches the source address.
When creating a standard ACL we have the option to use one of the following:
Personally, I find it easier to use named ACLs when creating ACLs so that they can be easily identified by anyone amending the configuration.
If we use numbers to create our standard ACL, we need to use a number between the following ranges in order for our Cisco IOS devices to understand it:
Despite the lack of functionality, standard ACLs can be extremely useful in a number of different scenarios:
Configuration
Let’s take a look at how we can configure standard ACLs on our Cisco devices.
Configuring Numbered Standard Access-List
We’ll start off by configuring a numbered standard ACL. The first thing we need to do is create the ACL on our device.
R1#configure terminal
R1(config)#ip access-list standard 1
We can create the numbered standard ACL using the ip access-list standard command, followed by the number we want to allocate to it. In this example, I’ll use 1.
Remember, the number we use for our standard ACL needs to fall into the numbers outlined earlier in the lesson.
R1(config-std-nacl)#permit 192.168.10.0 0.0.0.255
R1(config-std-nacl)#permit 192.168.20.0 0.0.0.255
R1(config-std-nacl)#exit
We then need to add our ACL rules, known as Access Control Entries (ACEs).
This is achieved using the permit or deny command, followed by the source address and wildcard mask.
Remember, there is an explicit deny at the bottom of every ACL.
Configuring Named Standard Access-List
Let’s take a look at how we can configure a named ACL on our device.
R1#configure terminal
R1(config)#ip access-list standard FILTER_NETWORKS
We can create the named standard ACL using the ip access-list standard command, followed by the name we want to allocate to it. In this example, we’ll use FILTER_NETWORKS.
R1(config-std-nacl)#permit 192.168.10.0 0.0.0.255
R1(config-std-nacl)#permit 192.168.20.0 0.0.0.255
R1(config-std-nacl)#exit
As before, we then need to add our ACL rules, known as Access Control Entries (ACEs).
This is achieved using the
permit or deny
command, followed by the source address and wildcard mask.
Remember, there is an explicit deny at the bottom of every ACL.
Before the ACL will work, we need to apply it to an interface or function on our device.
The command used to apply the ACL to an interface or function on our Cisco devices varies depending on where it’s applied.
Let’s take a look at some examples.
Applying Standard Access-List to VTY Lines
We’ll start by applying our ACL to a VTY line to filter the subnets that can remotely access our device.
R1(config)#line vty 0 15
R1(config-line)#access-class 1 in
This is achieved with the access-class command, followed by the number we assigned to our ACL – 1.
Finally, we need to instruct our device which direction we want to filter our traffic, inbound of outbound. In this example, we want to filter traffic inbound to our device with the in command.
Applying Standard Access-List to Interface

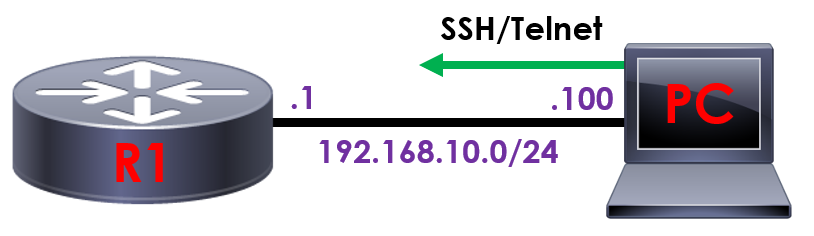
Let’s take a look at applying our ACL to an interface. To provide some context, lets take a look at the topology below.
R1(config)#interface GigabitEthernet0/0
R1(config-line)#ip access-group 1 in
Verification
Now we’ve configured some standard ACLs on our Cisco device, lets take a look at how we can verify the configuration and confirm our ACL is working as intended.
Verify ACL Rule List & Matches
We can confirm what rules (ACEs) are applied to our standard ACL as below.
R1#show ip access-lists 1
Standard IP access list 1
10 permit 192.168.10.0, wildcard bits 0.0.0.255 (20 matches)
20 permit 192.168.20.0, wildcard bits 0.0.0.255 (15 matches)
Firstly, we can use the show ip access-lists command followed by the number we allocated to our ACL – in this case, 1.
R1#show ip access-lists FILTER_NETWORKS
Standard IP access list 1
10 permit 192.168.10.0, wildcard bits 0.0.0.255 (20 matches)
20 permit 192.168.20.0, wildcard bits 0.0.0.255 (15 matches)
Alternatively, we can use the show ip access-lists command followed by the name we configured our ACL with – in this case FILTER_NETWORKS.
The great thing about this command is that it provides us with a wealth of information, including:
Confirm ACL Applied to Interface
Unfortunately, there’s not a simple command we can use to determine which interfaces our standard ACLs are applied to.
R1#show run interface GigabitEthernet0/0
Building configuration…
Current configuration : 112 bytes
!
interface GigabitEthernet0/0
ip address 192.168.10.1 255.255.255.0
ip access-group 1 in
end
If we know the interface our ACL has been applied to, we can run the show run interface command followed by the interface name – GigabitEthernet0/0.
Alternatively, if we’re unsure on the interfaces our ACL has been applied to we can filter our show run command as follows.
R1#show run | inc interface | access-group
interface GigabitEthernet0/0
ip access-group 1 in
interface GigabitEthernet0/0
Interface Serial2/0
Interface Serial2/1
As such, we can run a show run | inc interface | access-group. The command will filter our show run command and filter it to display the interfaces with ACLs applied.