Cisco WLC TACACS+ Configuration
In order for our network devices to operate with the device admin feature and use TACACS+, a number of commands are required.
In this lesson, we’ll break down the required WLC TACACS+ configuration step-by-step. Once we’ve finished, our devices will be ready to use the device administration feature.
Overview
Like other Cisco products, the WLC (Wireless LAN Controller) can utilise TACACS+. In turn, this can be used to control access.
By default, our Cisco wireless controllers require TACACS+ enabling. In addition to this, we need to tell them where to send the TACACS+ communicate to.
WLC TACACS+ Configuration
In order to help us understand the configuration, I will be using the topology detailed below.
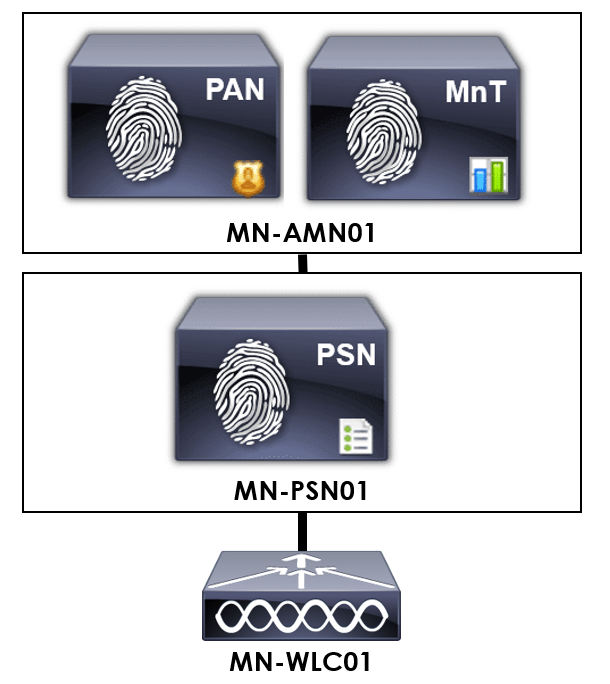
For our example, we have one PSN (Policy Service Nodes) authenticating TACACS+ requests; MN-PSN01. As such, we’ll point our wireless controller at MN-PSN01.
Within our controllers, there’s three sections to configure our TACACS+ servers:
1. TACACS+ Authentication Configuration:
To start, we’ll configure our authentication servers. These will be used by the wireless controller for TACACS+ authentication requests.
Our TACACS+ authentication servers can be configured as follows:
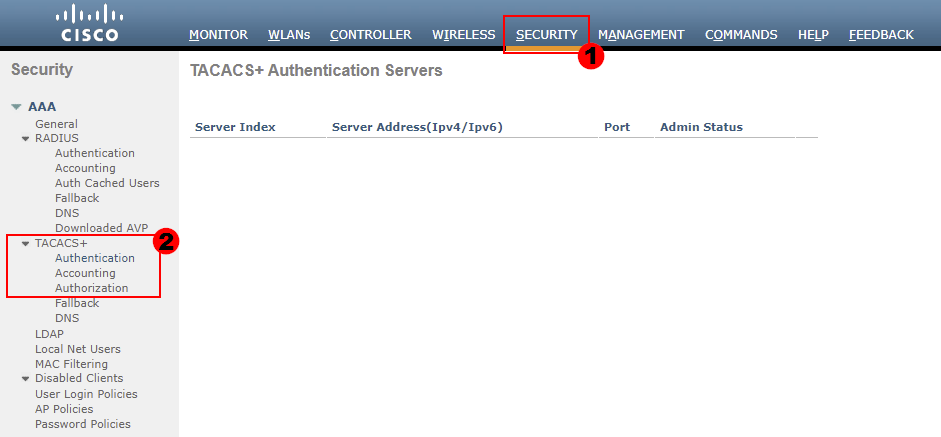
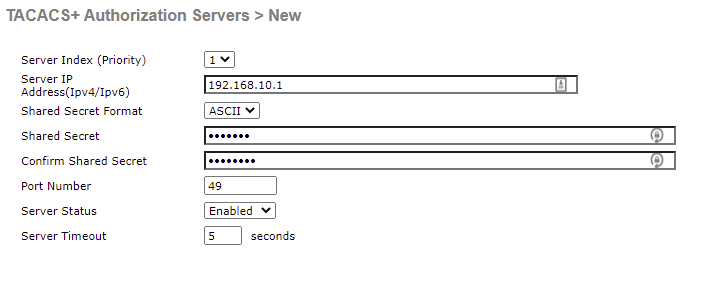
SECURITY > TACACS+ > Authentication > New…
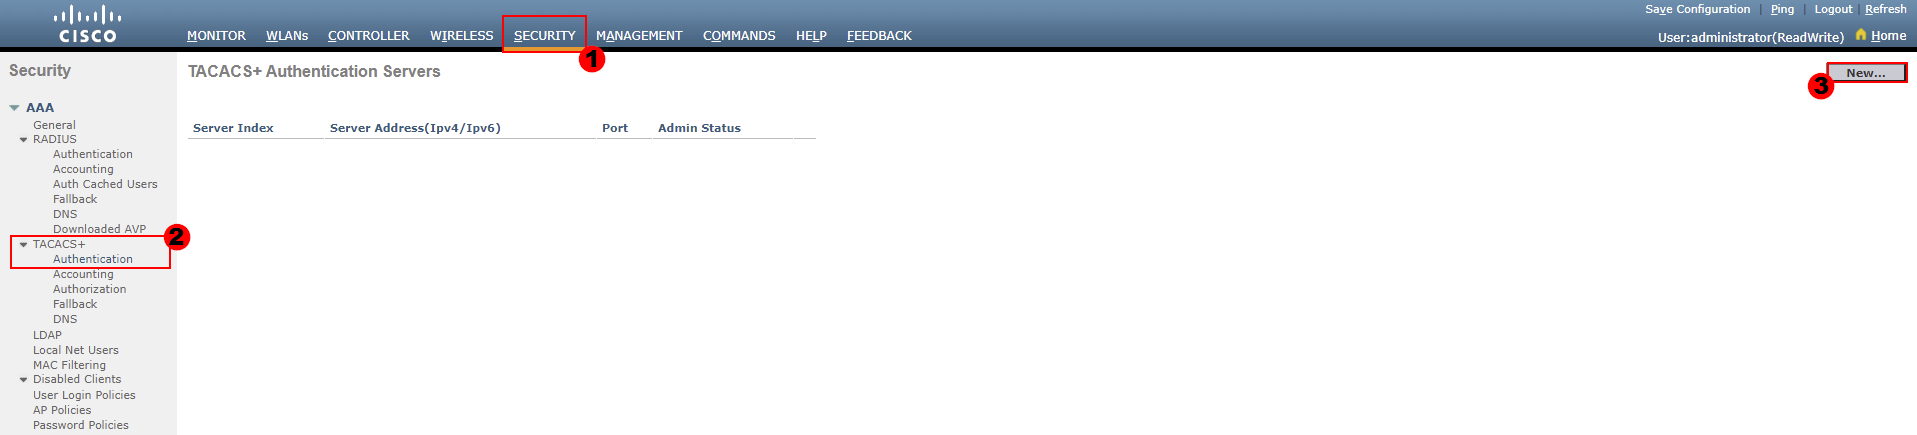
From here, we need to configure our TACACS+ server that will be used for authentication requests.
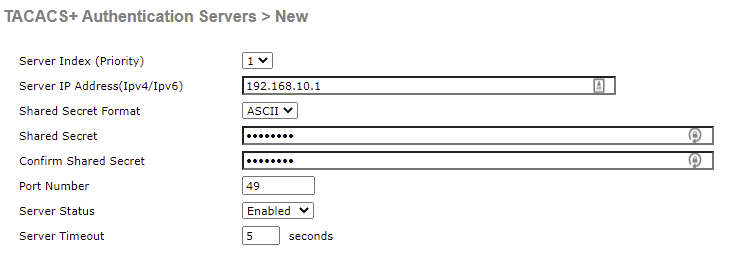
Information required, includes:
You will need to configure each server authenticating TACACS+ requests separately.
2. TACACS+ Accounting Configuration:
If we’d like our wireless controller to log all of the actions completed by users, we require an accounting server configured. Our TACACS+ server used for authentication can again be used for our accounting information.
Our TACACS+ accounting servers can be configured as follows:
SECURITY > TACACS+ > Accounting > New…

From here, we need to configure our TACACS+ server that will be used for accounting information.

3. TACACS+ Authorization Configuration:
In order to provide granular control over what users can access, we use authorization rules. If we’d like to control which configuration our users can view or amend, we require a authorization server.
All access requests to view or change configuration will then be sent to this server. To start, we’ll configure our accounting servers. These will be used by the wireless controller to log all actions completed by authenticated users.
Our TACACS+ accounting servers can be configured as follows:
SECURITY > TACACS+ > Authorization > New…
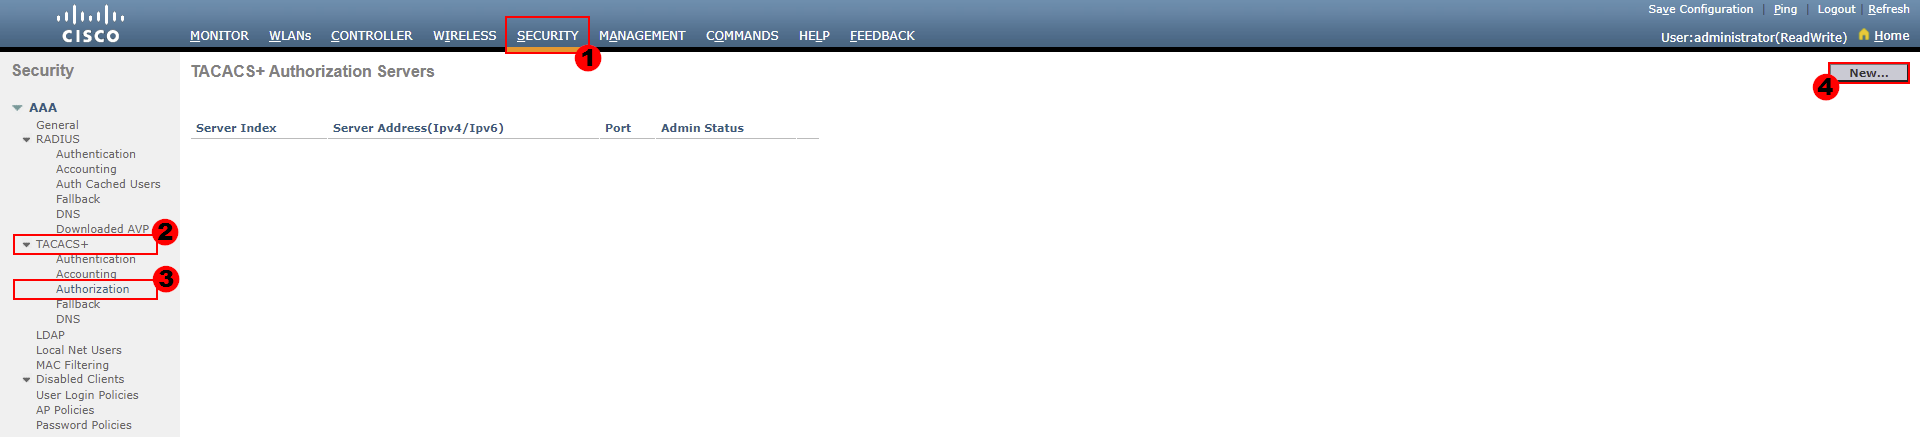
From here, we need to configure our TACACS+ server that will be used for authentication requests.
4. TACACS+ Management Priority Configuration:
Finally, we need to configure our management priority. We can action this once our TACACS+ servers have been configured.
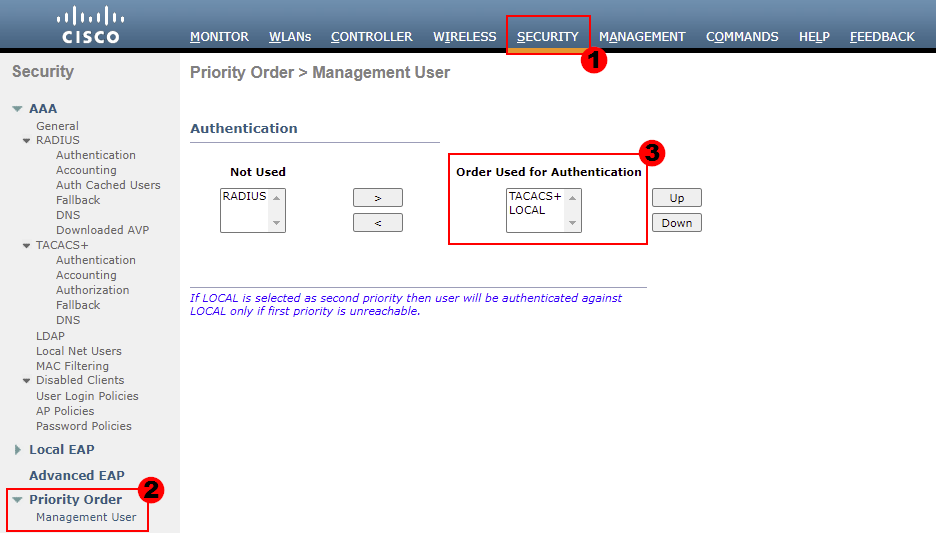
For our example, I’ve set our wireless controller to authenticate users in the following order:
The wireless controller will then authenticate users based on the location of the authentication method in the list. For our example, TACACS+ will be used first.
In the unlikely event that our controller is unable, the local authentication method will then be used. It’s highly advised that this is configured to avoid locking yourself out of the controller.