Configuring Network Devices (TACACS+)
To allow our network devices to exchange TACACS+ and AAA requests, they need to be configured on Cisco ISE. In this lesson, we’ll take a look at why this is required and the configuration process.
Overview
Our Cisco ISE platform and network devices need to interact with each other. In order for this to occur, both sides need to mutually agree a key.
When one of our network devices receives a AAA request, it will be sent to Cisco ISE. The Cisco ISE platform will then check to confirm the device is configured and the key exchanged matches.
Until our devices have been configured within ISE, they cannot service AAA requests.
In addition to authenticating AAA requests, our network devices can also be utilised with policy sets. Our rules can be fine-tuned to provide certain permissions and outcomes, depending on the device.
Network Device Configuration
In this section, we’ll look at how to configure our network devices within Cisco ISE. As discussed already, this is required to allow our network devices to send AAA requests to ISE.
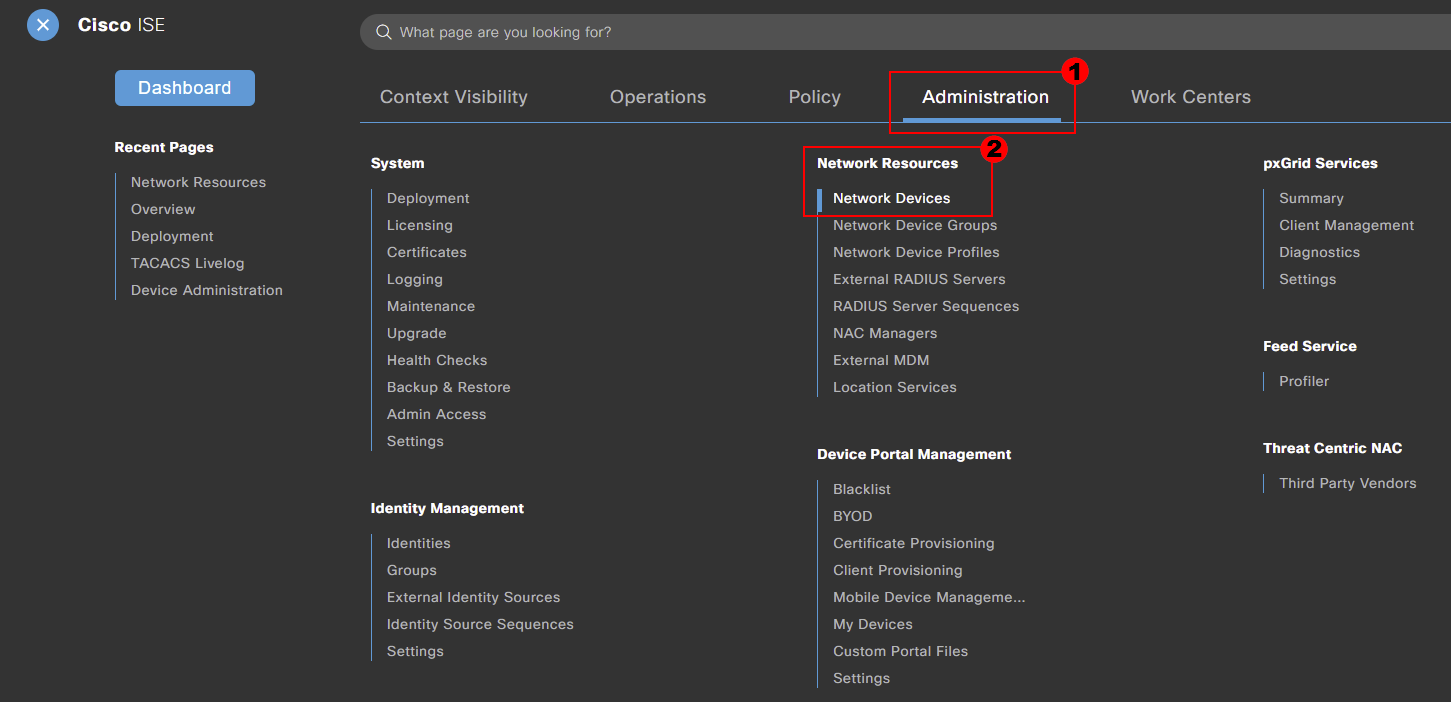
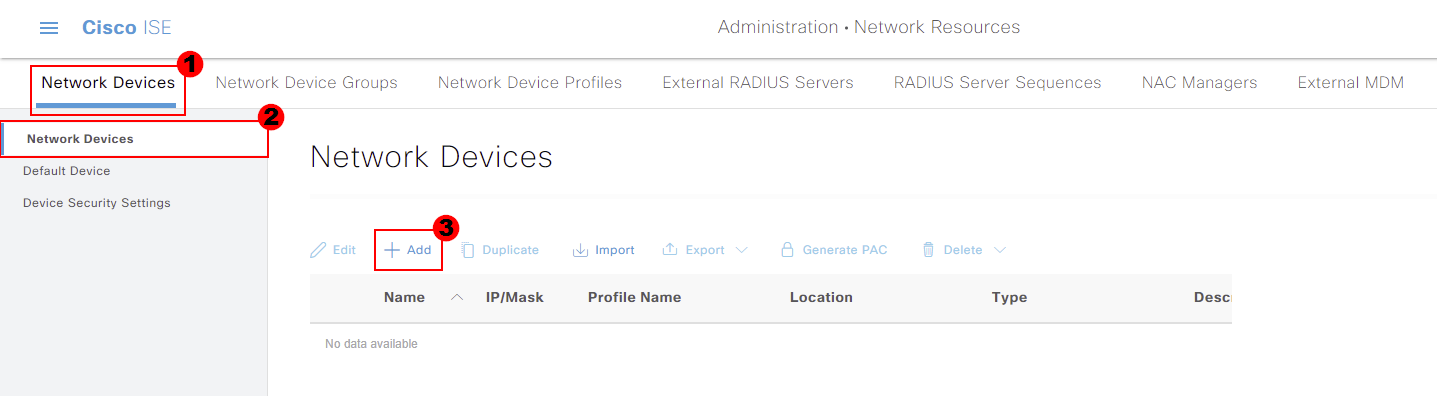
Our network devices can be configured within our Cisco ISE deployment by navigating to:
Menu > Administration > Network Resources > Network Devices
We’ll then add a new network device to Cisco ISE. This can be achieved by pressing Add.
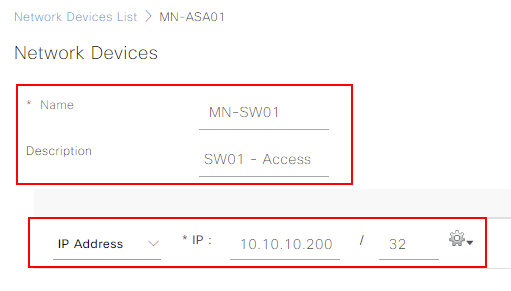
To start, we’ll provide the Name of our device; MN-SW01. Optionally, we can provide a Description.
Our Cisco ISE appliance then needs to know the IP address for the device. The IP address of MN-ASA01 is 10.10.10.200. To have granular control over devices communicating with Cisco ISE, I recommend setting the IP
address with a /32 mask.
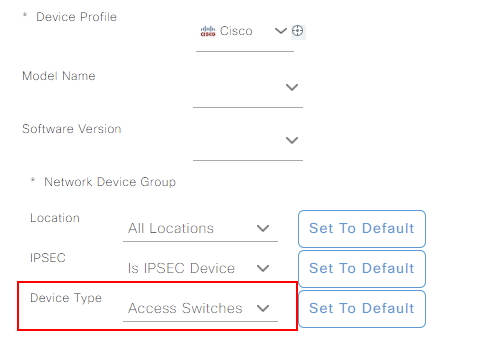
Scrolling down the page allows us to apply a number of parameters to the device. These include:
Some of which, you may remember from our previous lesson. These parameters can be selected, depending on the features used within ISE.
For now, I’ll just set our device type as Access Switches. This is the group we created in our previous lesson.
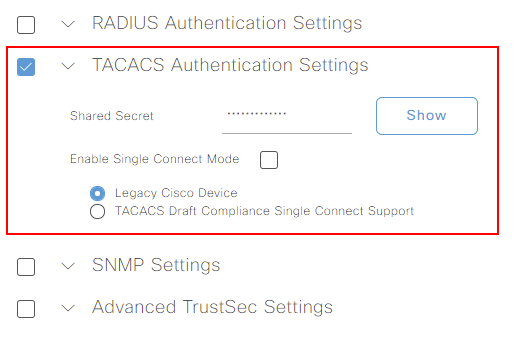
Our final job is to enable the TACACS Authentication Settings. Within here, a Shared Secret is required. This needs to match between our device and Cisco ISE. I’ll set the key to the same we used in our ASDM TACACS+
configuration lesson.
We’ll leave Enable Single Connect Mode disabled and Legacy Cisco Device enabled.
The configuration of our device is now completed. All that’s left to do is press Save. This step will need to be repeated for each device that will communicate with Cisco ISE.
Our network device will now be listed under our Network Devices list.

If we head over to our Network Device Groups configuration. This can be accessed via:
Menu > Administration > Network Resources > Network Device Groups
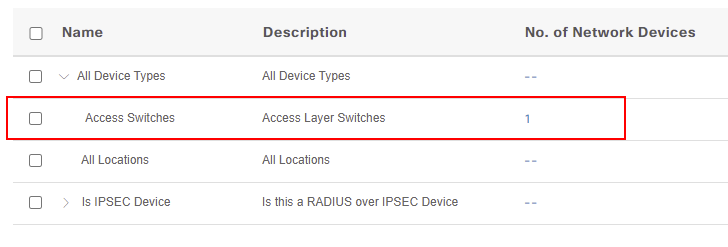
Within here, our Access Switches group now shows as having 1 network device associated to it.
Bulk Import Network Devices
Let’s imagine we have hundreds of network devices to add to Cisco ISE. This would take far to long to complete using the method outlined above. Surely there must be an easier way?
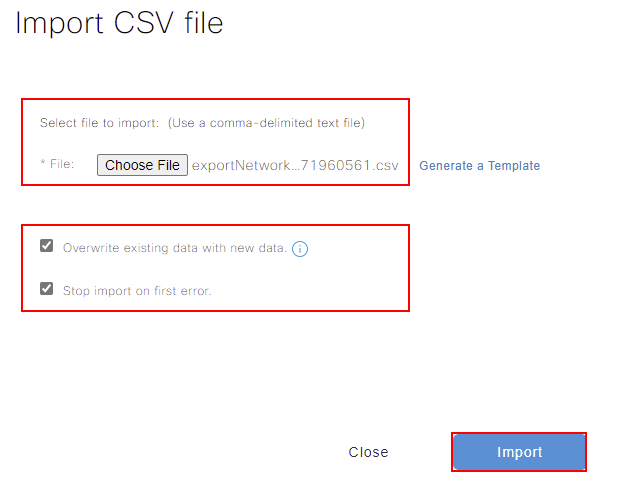
Thankfully within Cisco ISE, we have the ability to import network devices using a .CSV file.
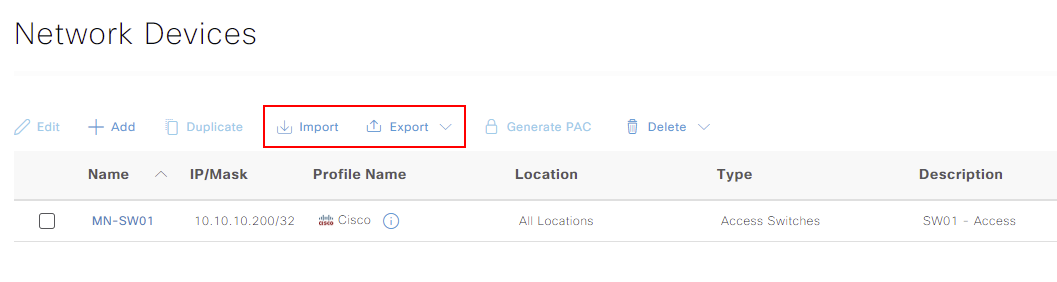
Before we can import our network devices, we need a template. We’ll start by navigating to our network device configuration. This can be achieved by navigating to:
Menu > Administration > Network Devices
Within here, you can see that we have the option to import or export network devices.
The ISE platform provides a template to use. However, I find it beneficial to export your devices first. This then provides you with examples on how to format the csv.
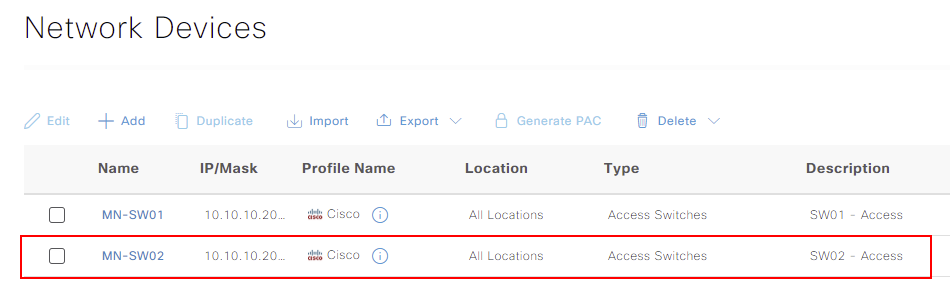
Below, you can see that I’ve exported our devices to use as a template.

In our example, I’ve added a new access switch; MN-SW02. I’ve marked this line in orange to highlight.
Now that our .csv file has been updated, we can import it to ISE.
Once our import has completed, our new network devices are displayed within Cisco ISE.