Enabling Device Administration (TACACS+) Feature
In order to utilise the device administration (TACACS+) feature, it needs to be enabled. This will need to be completed on each ISE node that’ll be processing TACACS+ requests.
In this lesson, we’ll break down where the feature needs to be enabled. From here, we’ll then break down the configuration step-by-step.
Overview
By default, our Cisco ISE deployment will have the device admin service disabled.
Where we run the device admin service is completely dependent on our design. Ultimately, we’ll run the device admin service on each policy service node (PSN) that will be processing TACACS+ requests.
If you recall from our previous lesson. You’ll require a device admin license, per node running running the service.
Device Admin Configuration
In this section we’ll look at how we can enable the device admin service. As mentioned before, this will need to be enabled on each ISE node serving TACACS+ requests.
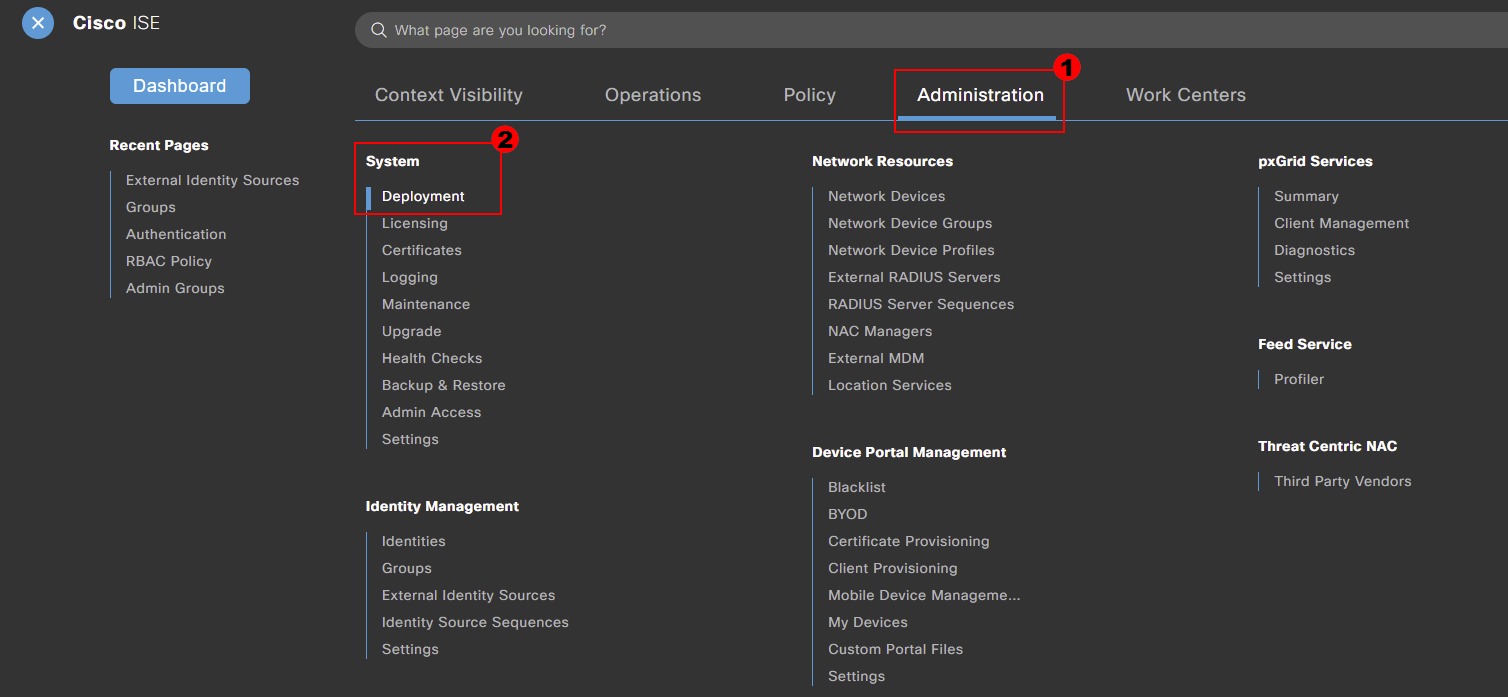
Device admin can be enabled by navigating to:
Menu > Administration > System > Deployment
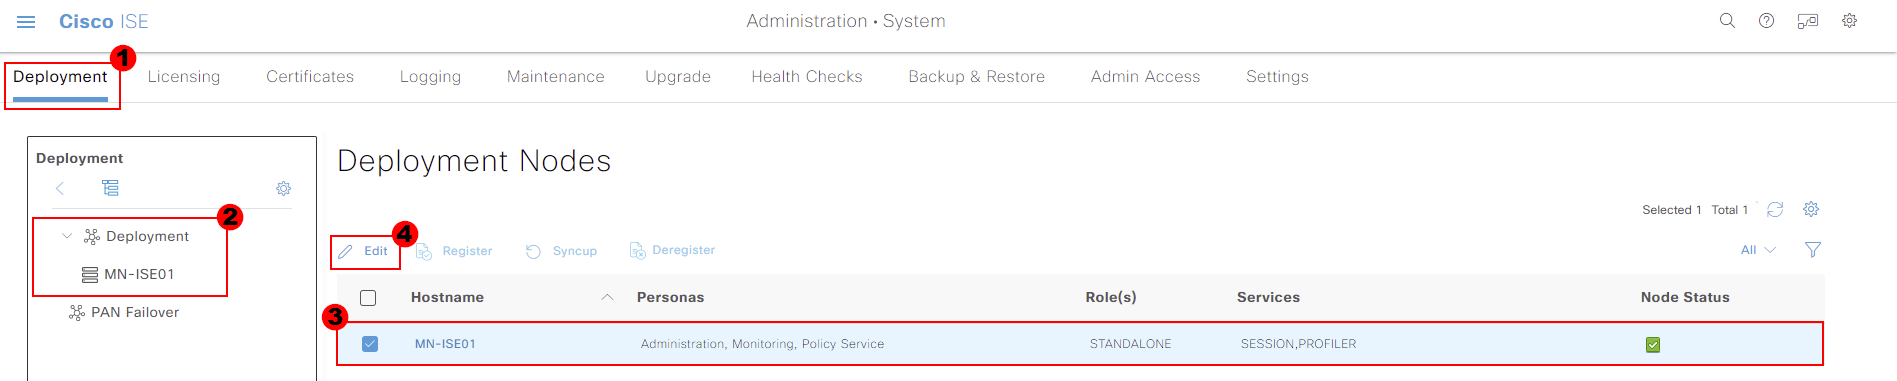
From here, we then select the required node that we want to enable the device admin service on.
Simply select your node (MN-ISE01 in my example) and select Edit.
Once the node has been selected, we can then enable the feature. This is achieved by selecting Enable Device Admin Service. This can be found under the Policy Service tab of options.
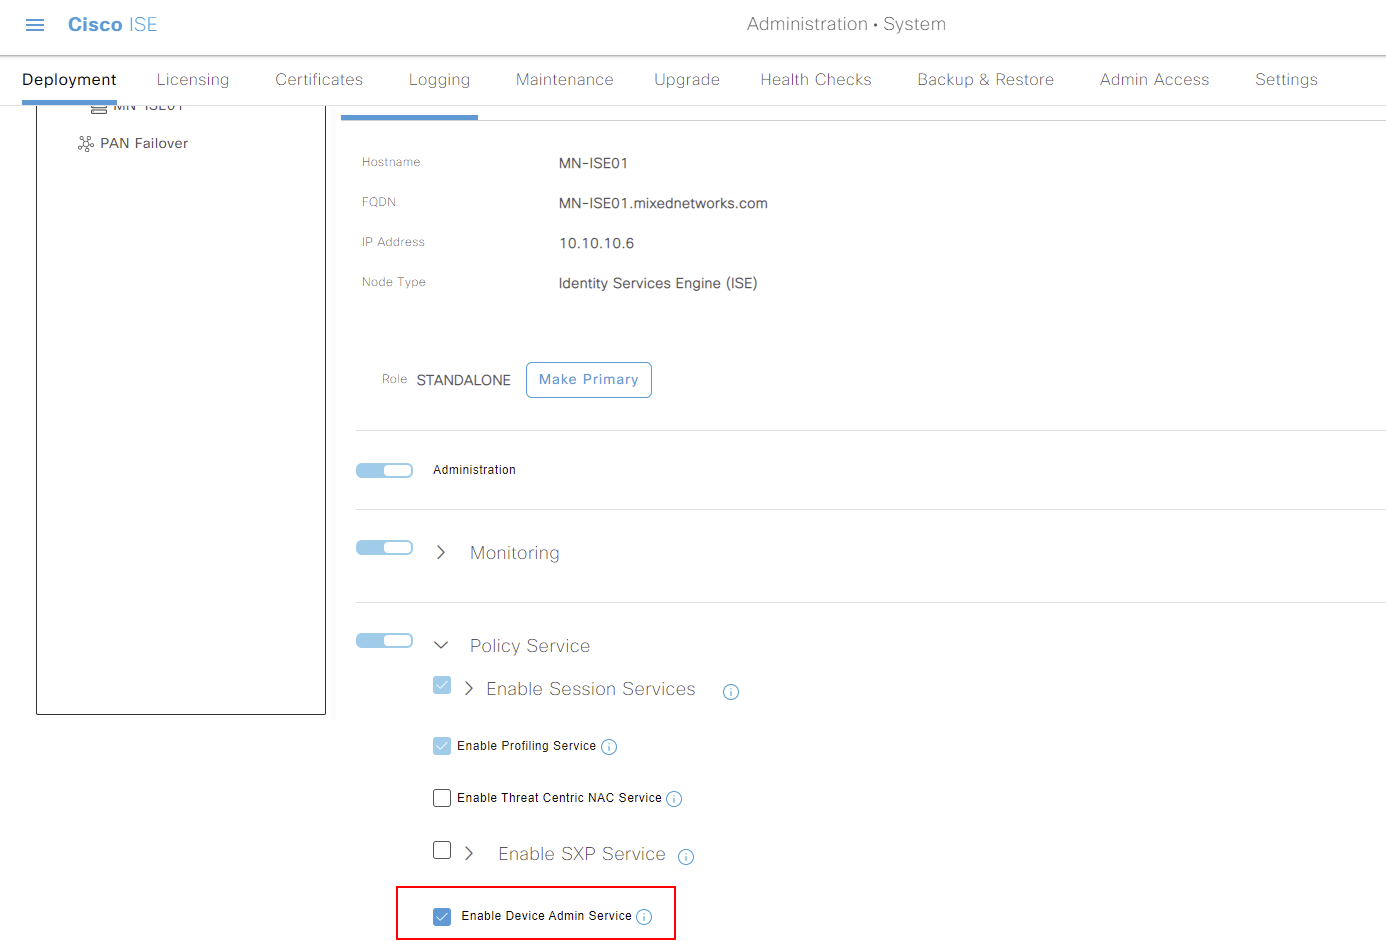
As soon as the feature, a warning will be presented. We can continue and press OK if we’re happy to proceed knowing the information presented.
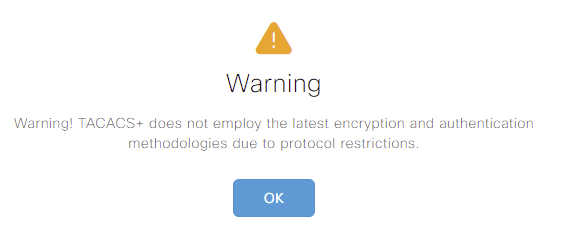
As soon as the feature, a warning will be presented. We can continue and press OK if we’re happy to proceed knowing the information presented.

The device admin feature has been been enabled on our Cisco ISE node. Remember, these steps will need to be repeated for each ISE node authenticating TACACS+ requests.
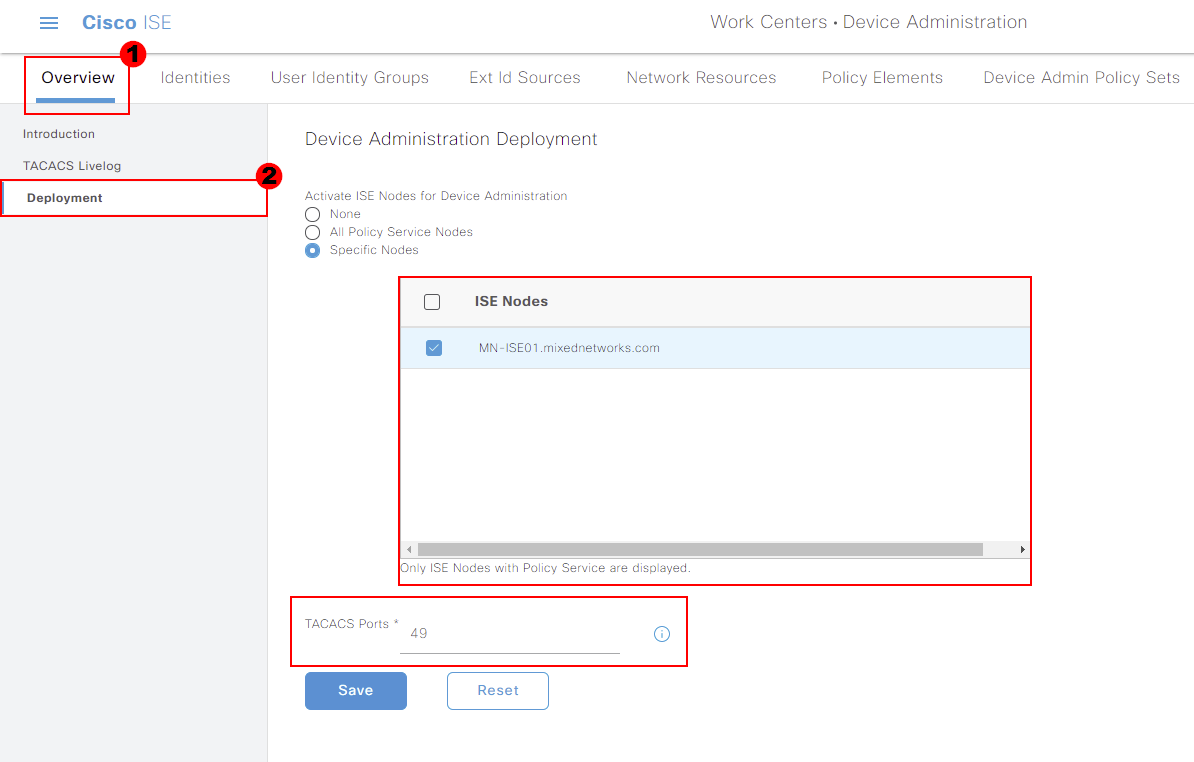
Device Admin Verification
Now that our device admin feature has been enabled on our Cisco ISE nodes, let’s look at how we can verify the configuration.
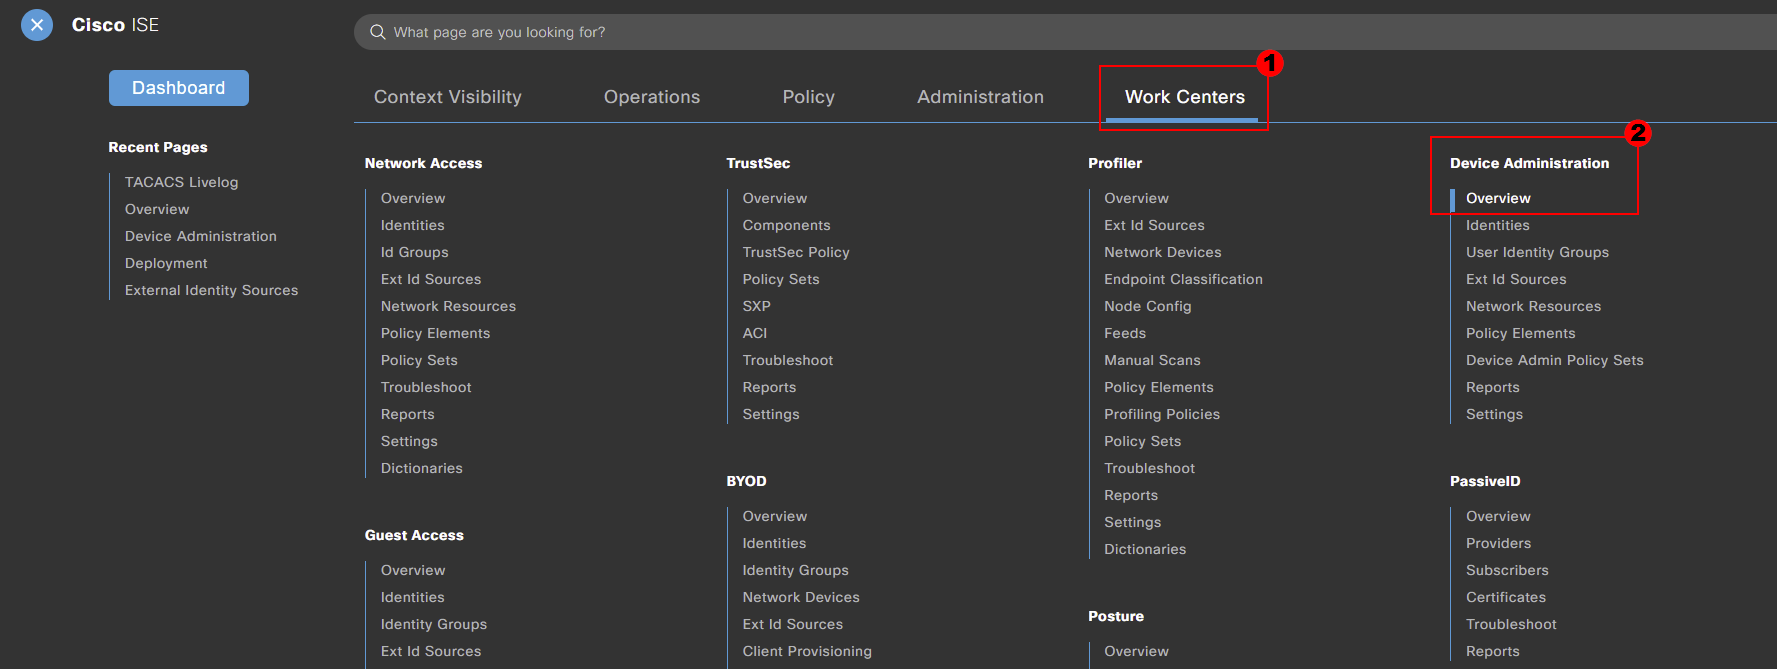
We’ll start by jumping over to the device administration work centre. This can be achieved by navigating to:
MENU > Work Centers > Device Administration > Overview
Displayed on the screen will be all nodes with the device admin feature enabled. Here, we can see my server MN-ISE01.
In addition to this, we can see that our node is also using the default TACACS+ port; 49. This can be amended if required.