Cisco ASA TACACS+ Configuration
In order for our network devices to operate with the device admin feature and use TACACS+, a number of commands are required.
In this lesson, we’ll break down the required WLC TACACS+ configuration step-by-step. Once we’ve finished, our devices will be ready to use the device administration feature.
Overview
Like other Cisco products, the ASA (Wireless LAN Controller) can utilise TACACS+. In turn, this can be used to control access.
By default, our Cisco ASAs require TACACS+ enabling. In addition to this, we need to tell them where to send the TACACS+ communicate to.
ASA TACACS+ Configuration – GUI / ASDM
For some, it can be easier to use ASDM to configure you ASA appliance. As such, in this section, we’ll be covering the configuration using ASDM.
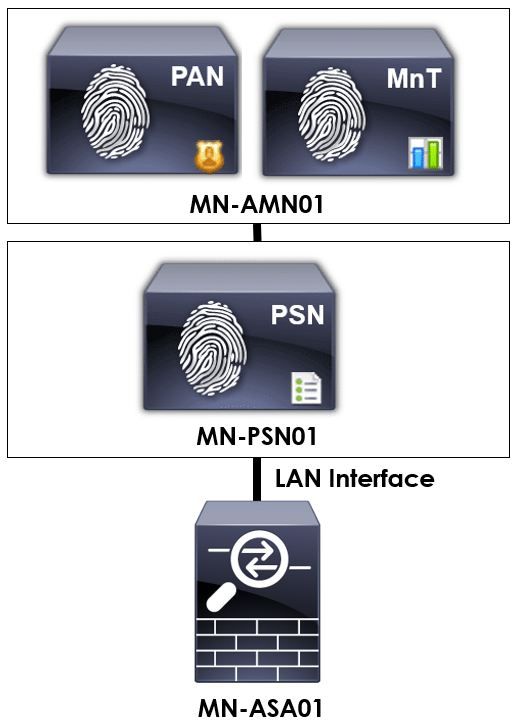
In order to provide some context to the configuration we’re applying, I’ll be using the topology below.
To start, we need to configure our TACACS+ / AAA servers. This is achieved by navigating to the following within ASDM:
Configuration > Device Management > Users/AAA > AAA Server Group
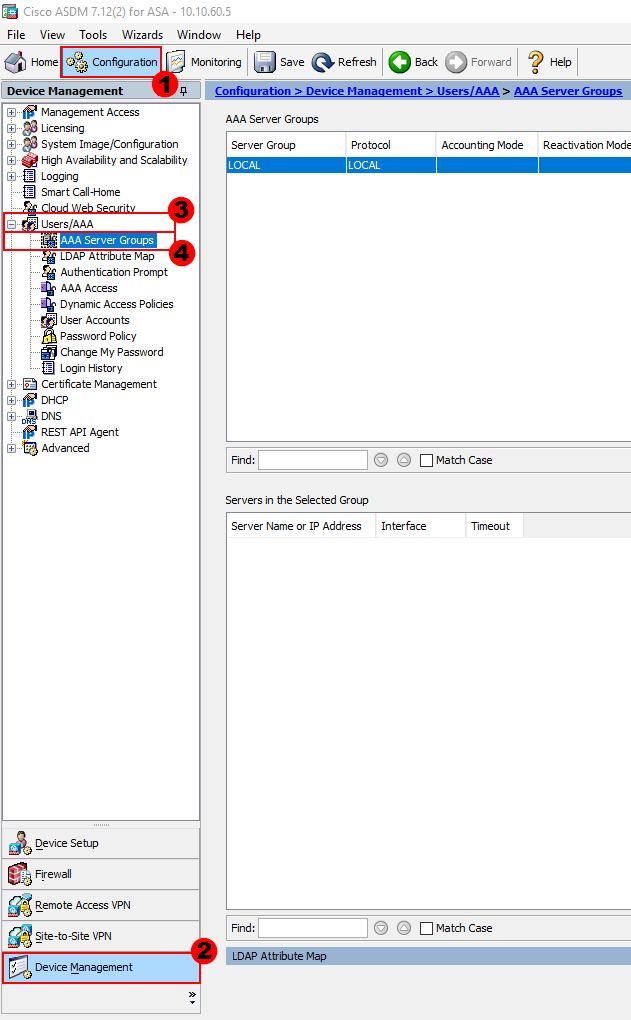
We can then create our TACACS+ / AAA server group. This will be used to contain all of our TACACS+ / AAA servers. We can create the group by selecting Add.
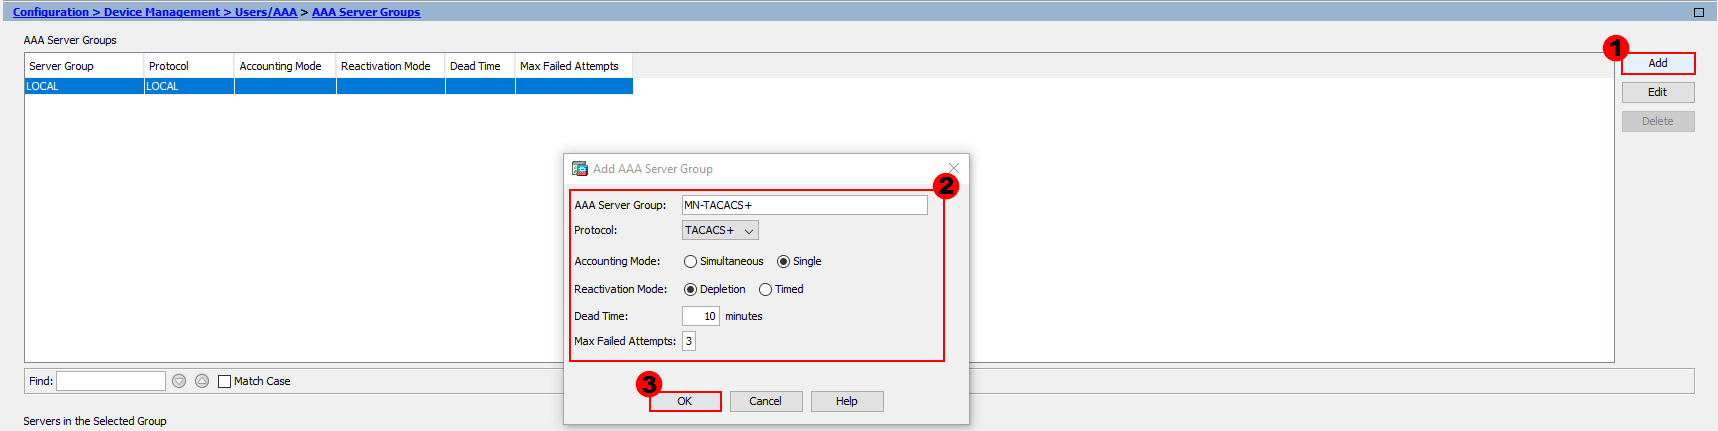
From here, we’ll configure our group. There are a number of parameters for us to configure.
AAA Server Group:- We’ll provide our group a logical name. I’ve called mine; MN-TACACS+.
Protocol:- The protocol we’ll be using is TACACS+.
Accounting Mode:- Here, we decide if we want to send accounting information to a single AAA server or all of them at once. In our example, we’ll just send accounting information to a single server.
Reactivation Mode:- This setting is used to determine what happens when a server fails. We have two methods; Depletion or Timed.
Selecting depletion means that once a server fails, it will only be reactivated once all other configured servers have become inactive.
On the flip side, the timed mode will try and reactivate failed servers after 30 seconds of down time.
In our example, we’ll be using depletion mode.
Dead Time:- This setting is only applicable when the depletion mode is in use. It’s the amount of time required once a server is disabled (if it becomes unreachable) before it can be reactivated. I’ll use 10 minutes for our example.
Max Failed Attempts:- Finally, this setting sets the number of failed connection attempts allowed before a nonresponsive server is made inactive. I’ll use the default of 3.
Once our group configuration is complete, let’s press OK.
The next step is to configure our AAA / TACACS+ servers and add them group we’ve just created.
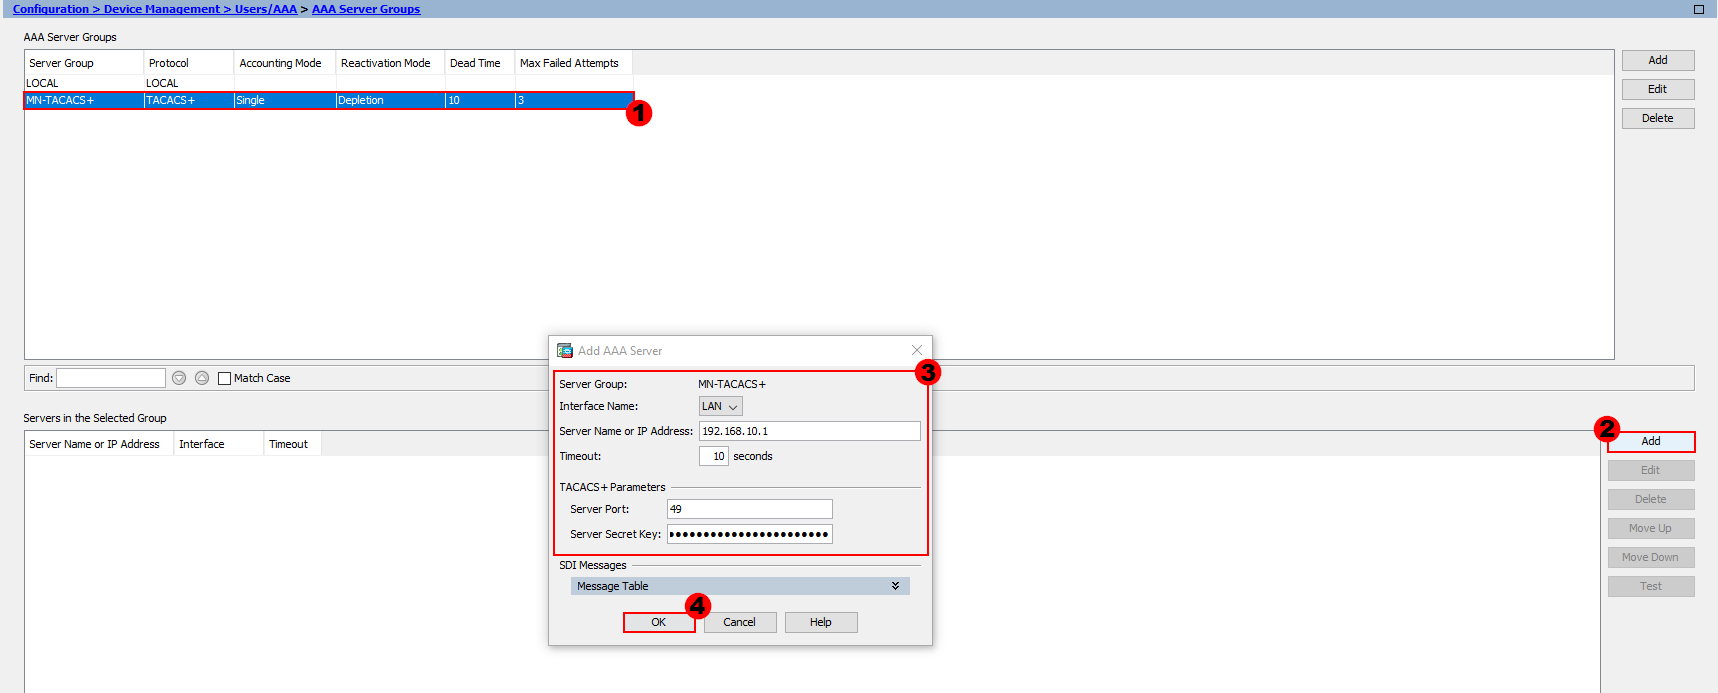
In order to configure our servers, firstly select the group you want to add them to. From here, select Add, as shown in the image above.
We’ll then configure the parameters accordingly.
Interface Name:- This is the interface used to contact the AAA / TACACS+ server. In my example, we need to use the LAN interface to reach our server.
Timeout:- The timeout setting tells our ASA how long to wait for a reply from our server. I’ll leave this as the default of 10 seconds.
Server Port:- By default, the port for TACACS+ is TCP/49. I’ll keep this as the default, however if you want to change the port you can do.
Server Secret Key:- Finally, both our ASA and AAA / TACACS+ server need to agree a key. I’ll use M1X3DN3TW0RK5.
Once we’ve configured our server, we’ll press OK. This step will need to be repeated for each server we want to add to our group.
Once our server have been configured, we need to configure our AAA parameters. This can be achieved by navigating to:
Configuration > Device Management > Users/AAA > AAA Access
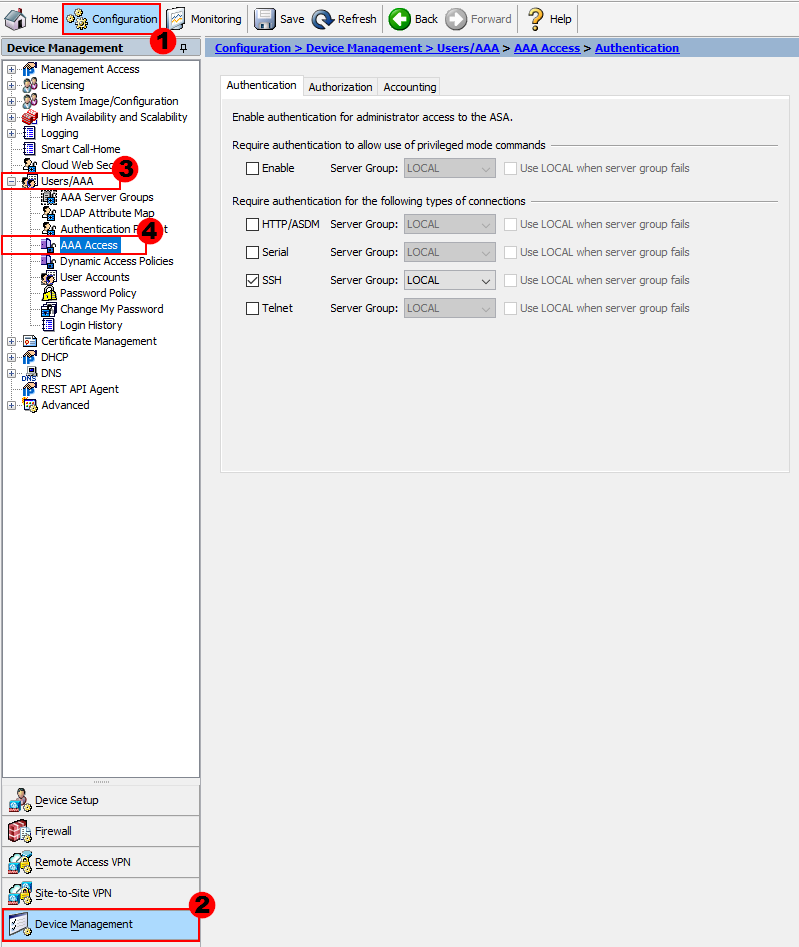
You’ll notice there are three tabs of configuration; Authentication, Authorization and Accounting.
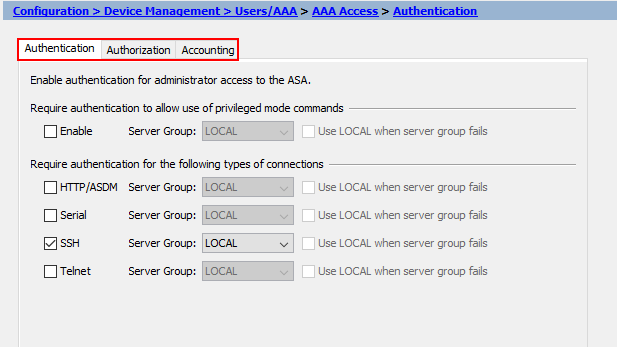
We’ll start with Authentication. Here we can control which method of authentication we use for each of the following:
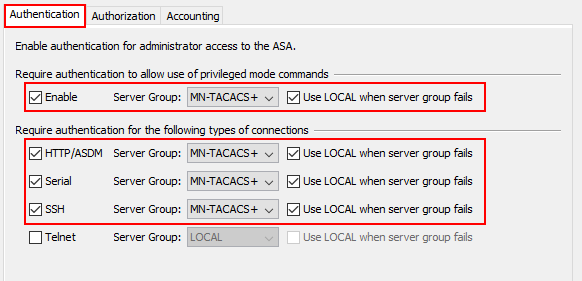
I’ll enable all forms of authentication, with the exception of telnet. Once enabled, we’ll select to use our MN-TACACS+ group for each of the authentication methods. We’ll also select to use LOCAL authentication if our TACACS+ servers are unreachable. This ensures we can still manage the device if our servers become unreachable.

Time to configure our authorization settings! First of all, we’ll select the tick boxes next to HTTP and Enable. Once ticked, we’ll select to use our server group on both. This will then require that all commands
entered via ASDM or CLI to be authorized with our remote TACACS+ server.
In order for exec commands to be authorized when entered, we need to select the Enable tick box. Under this, we can then decide if we want to authorize commands to a remote or local server. We want to require Cisco ISE to authorize
the commands for us so we’ll select Remote server.
Finally, I’ve also enabled Allow privileged users to enter into EXEC mode on login. This means that users logging into the device won’t need to enter an enable password to exec mode.
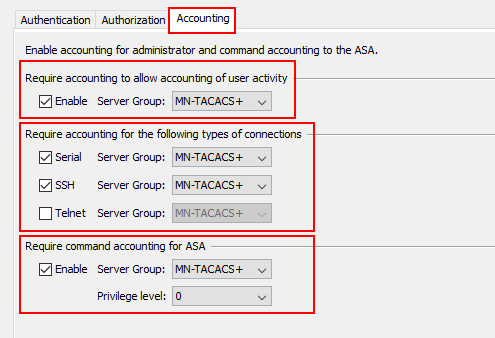
The final part of our configuration is accounting. Here, we’re telling our ASA to send all commands and actions that have taken place, and by whom, to our TACACS+ servers.
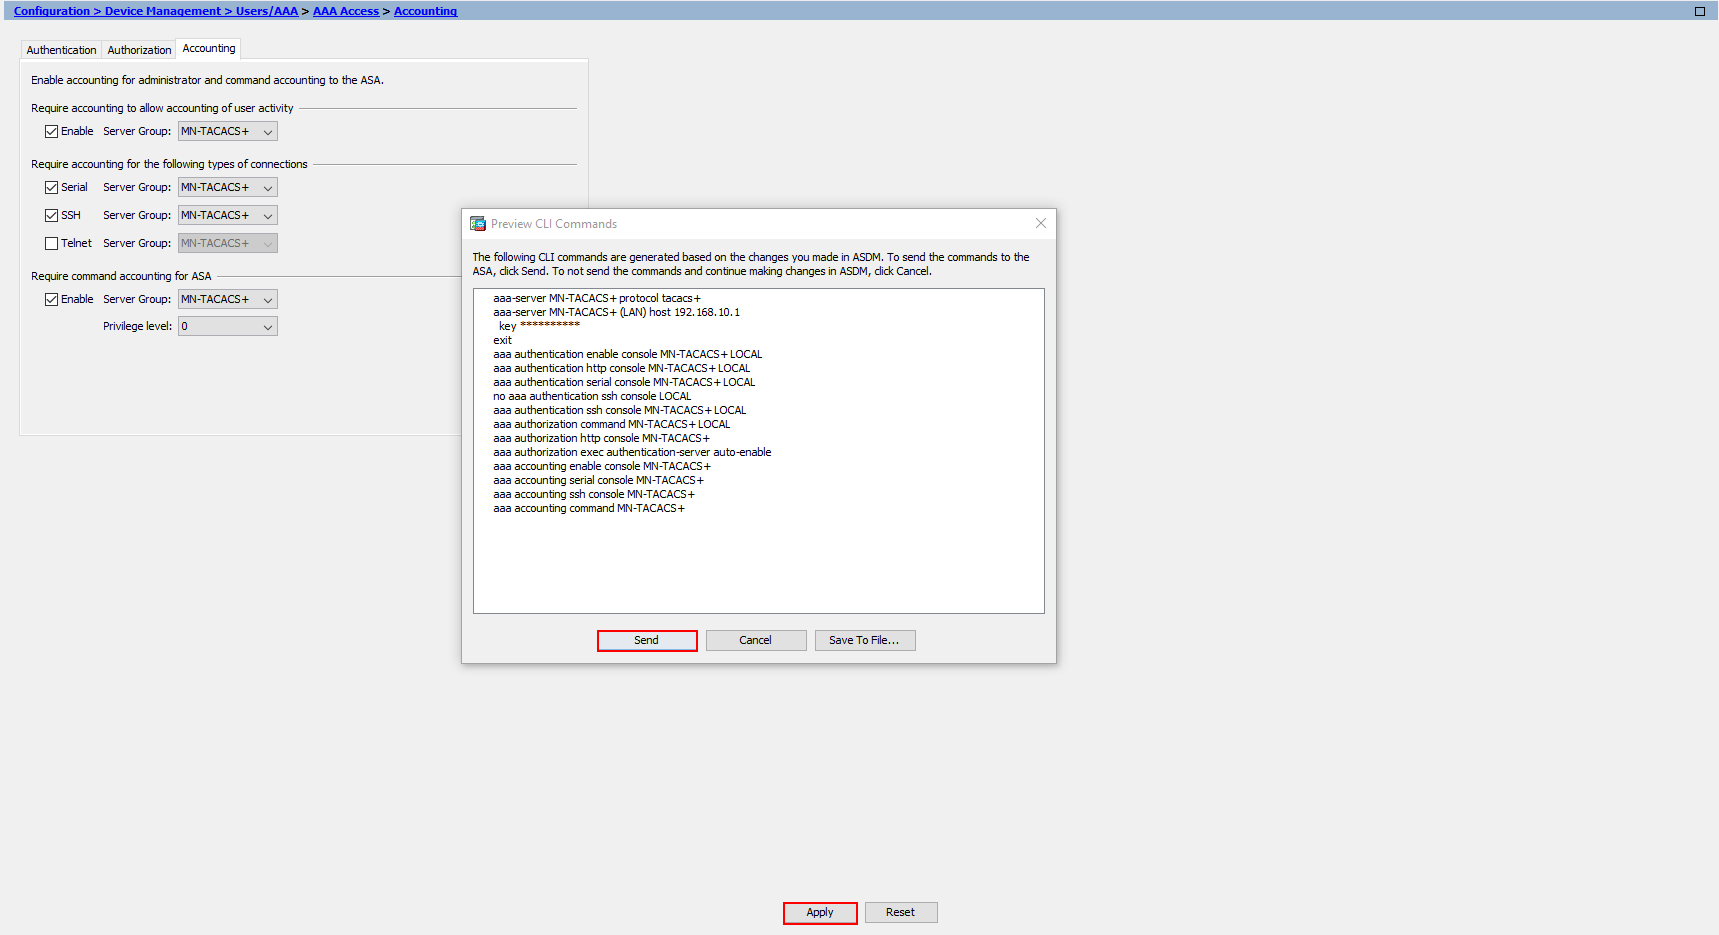
Now the configuration has finished, the last thing for us to do is apply it to our Cisco ASA. We’ll press Apply at the bottom.
If you have configuration preview enabled, you’ll also see the configuration before it’s applied to our device.