ISE External Access (Active Directory)
Managing Cisco ISE via local accounts can be pain. Instead, it can be easier to manage it via AD (Active Directory) credentials. In this lesson, we’ll be taking a look at how we can configure the ISE portal to authenticate Active Directory credentials.
Before you continue with this lesson, you’ll need to integrate your ISE deployment with Active Directory. You can follow along with this in our previous lesson;
Integrating Cisco ISE (3.0) with Active Directory.
Overview
Creating separate, individual accounts within Cisco ISE to manage it can be a nightmare to manage. As such, in most instances it’s preferred to integrate the ISE admin portal with an external identity source. The most common being
Active Directory.
With an external identity source, we can easily provide role-based access control, depending on a users group membership. This then reduces the need to have additional accounts to manage ISE, instead using their Active Directory
credentials.
Admin Access Configuration
The first step is to pull our required groups from Active Directory. To do this, we need to navigate to our external identity source. This can be achieved by navigating to:
Menu > Administration > External Identity Sources
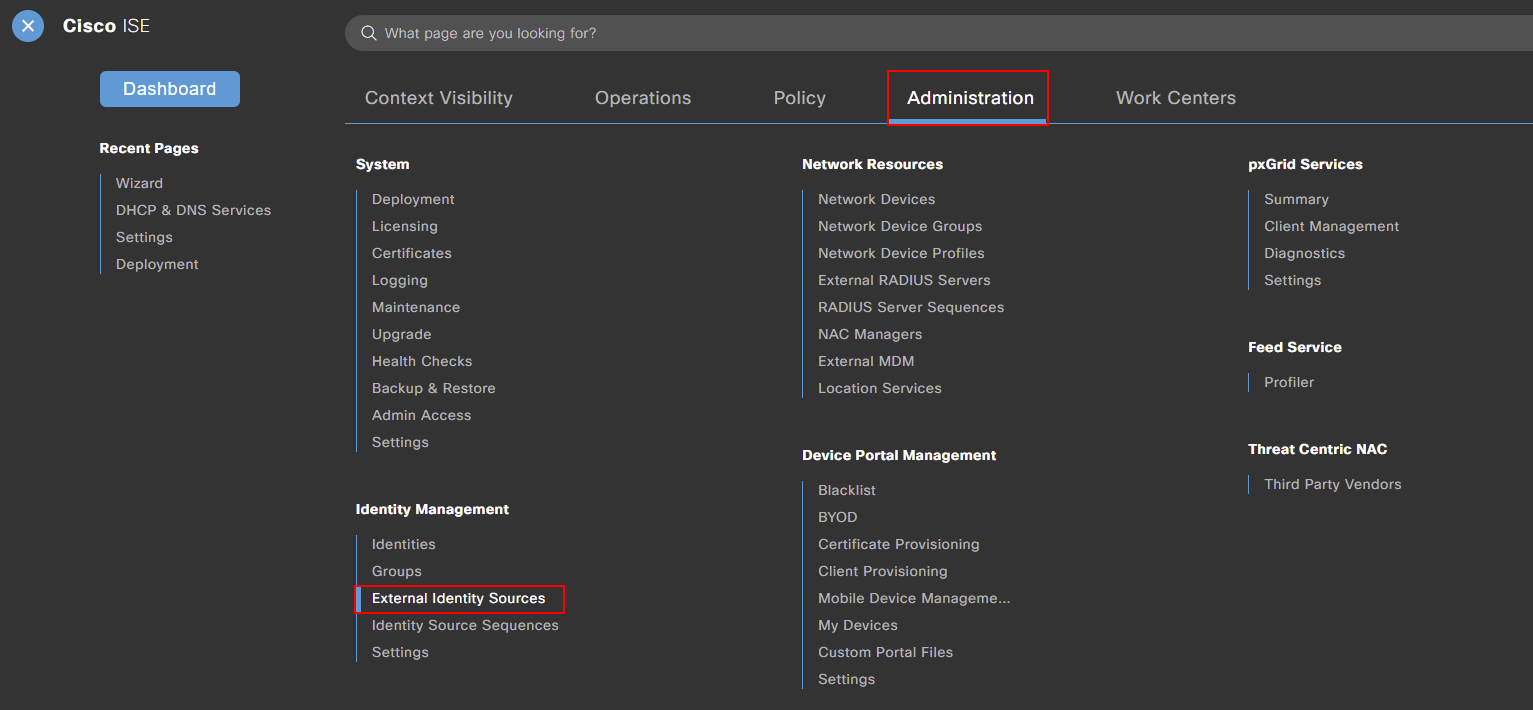
Under our external identity sources, we should see our active directory configuration. Mine’s called MN-AD.
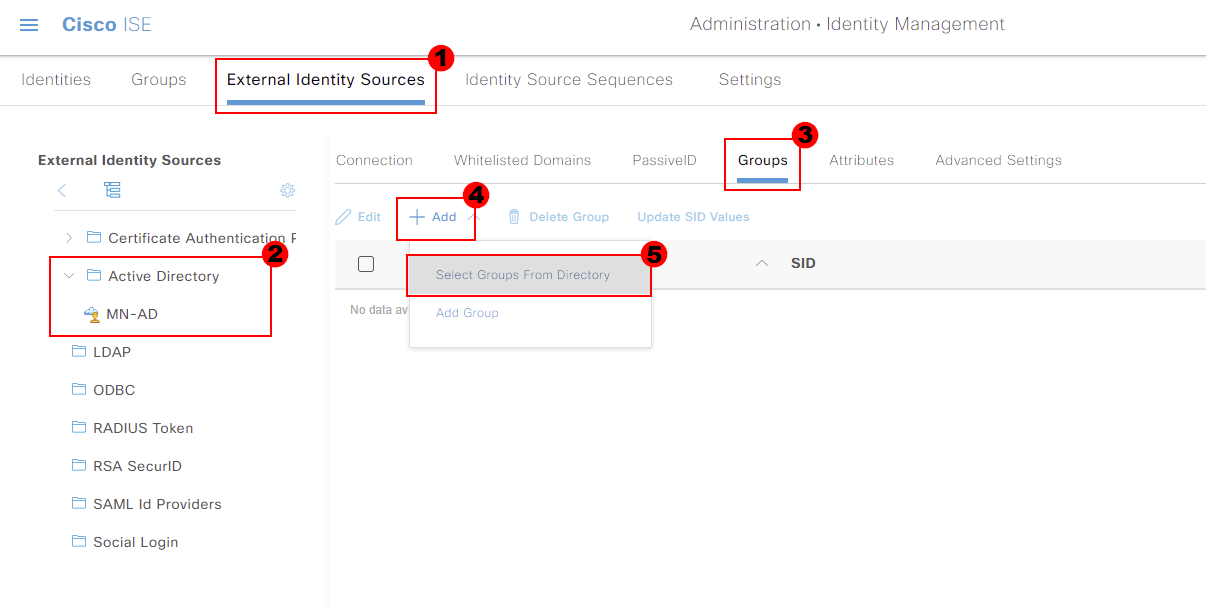
If I click into our active directory configuration (MD-AD) and select Groups. We then get the option to Add and choose Select Group from Directory.
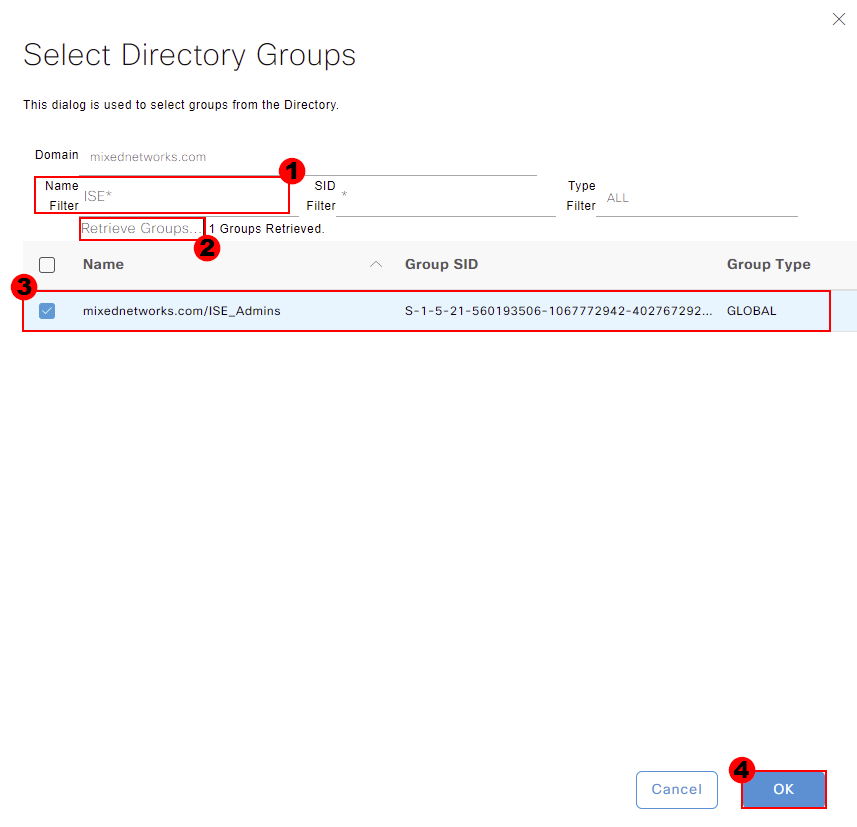
A new window will then appear, allowing us to search for groups within our Active Directory. You can filter for groups using the Name Filter.
I will search my Active Directory for ISE*. It’s worth noting that * acts as a wildcard. We can then press Retrieve Groups for our ISE platform to pull all groups within Active Directory that contain
the word ISE.
Cisco ISE has then pulled through a group called ISE_Admins. I’ll select this group and press OK.
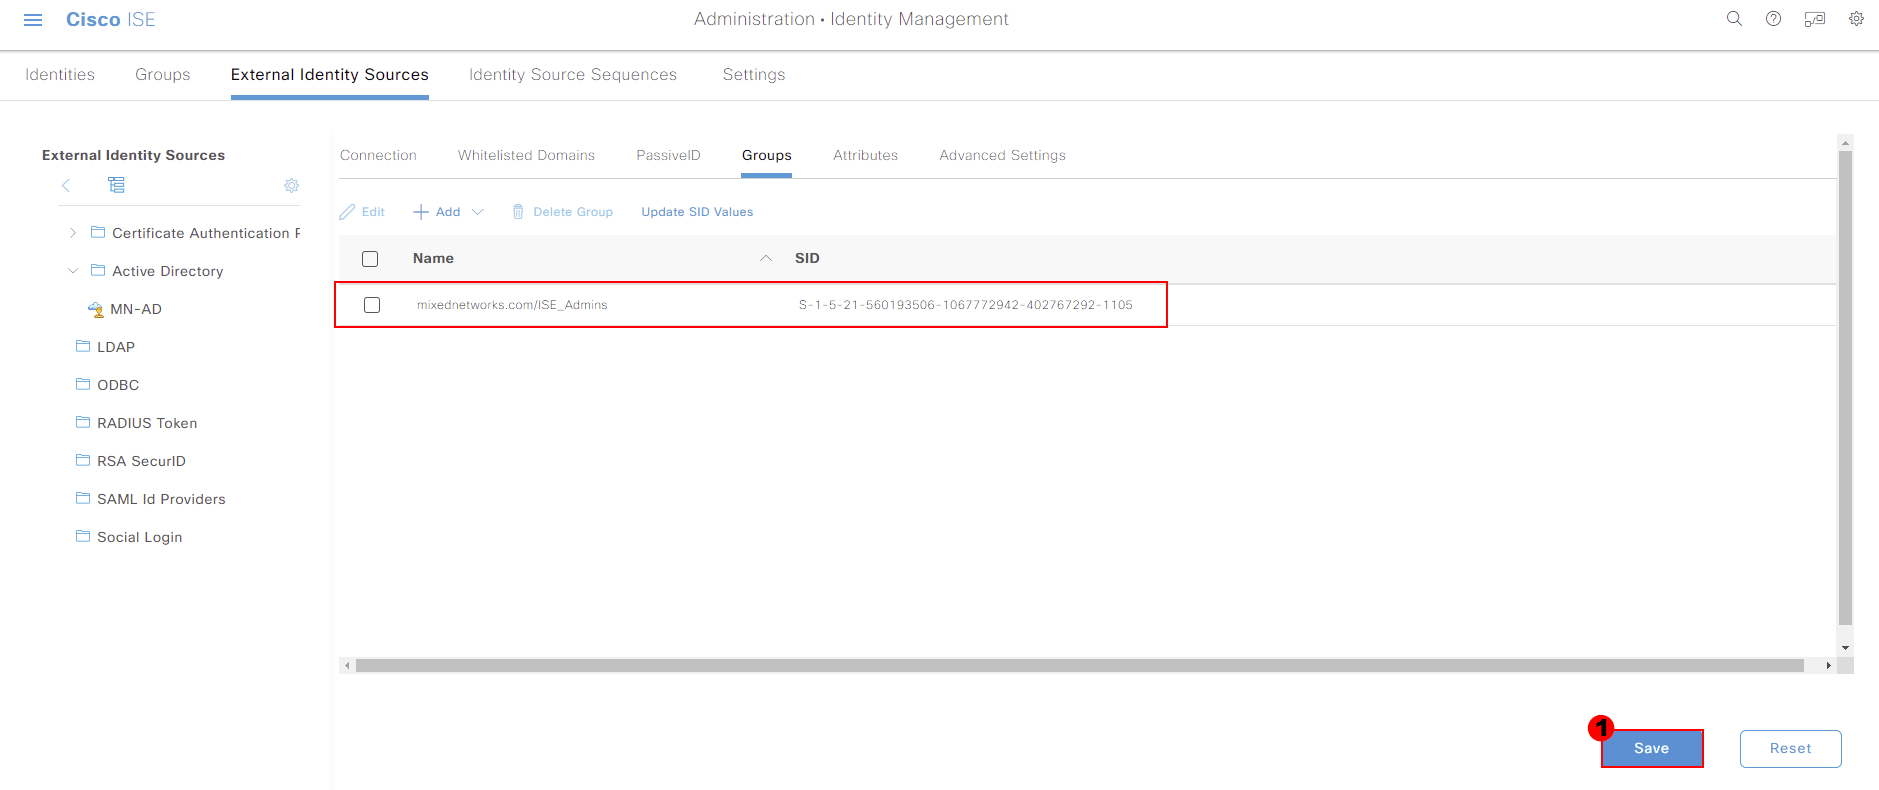
We’ll then be taken back to our external identity source configuration. You should now see the group we pulled through as well. Press Save at the bottom of the page to store this change.
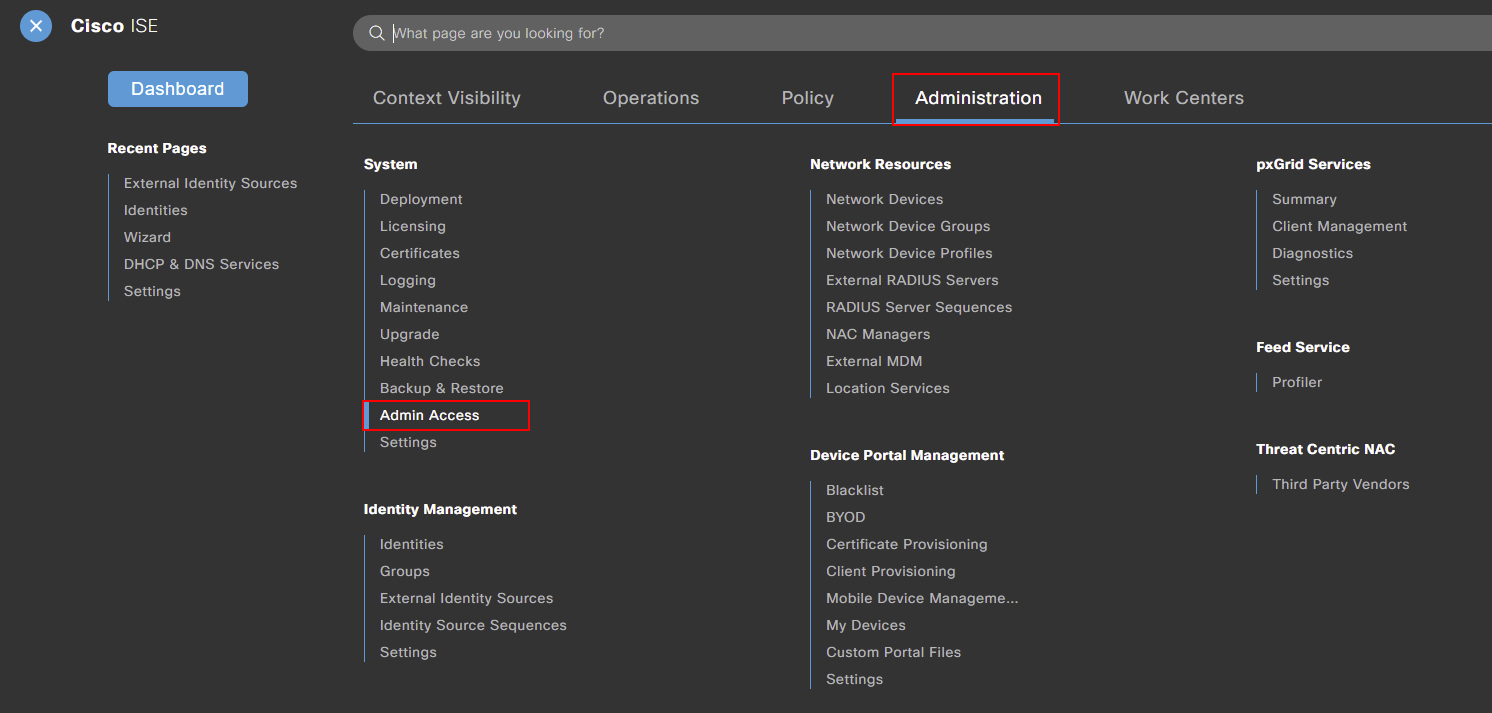
Now that we’ve pulled our group through from Active Directory, we now need to configure our admin access. This can be achieved by navigating to:
Menu > Administration > Admin Access
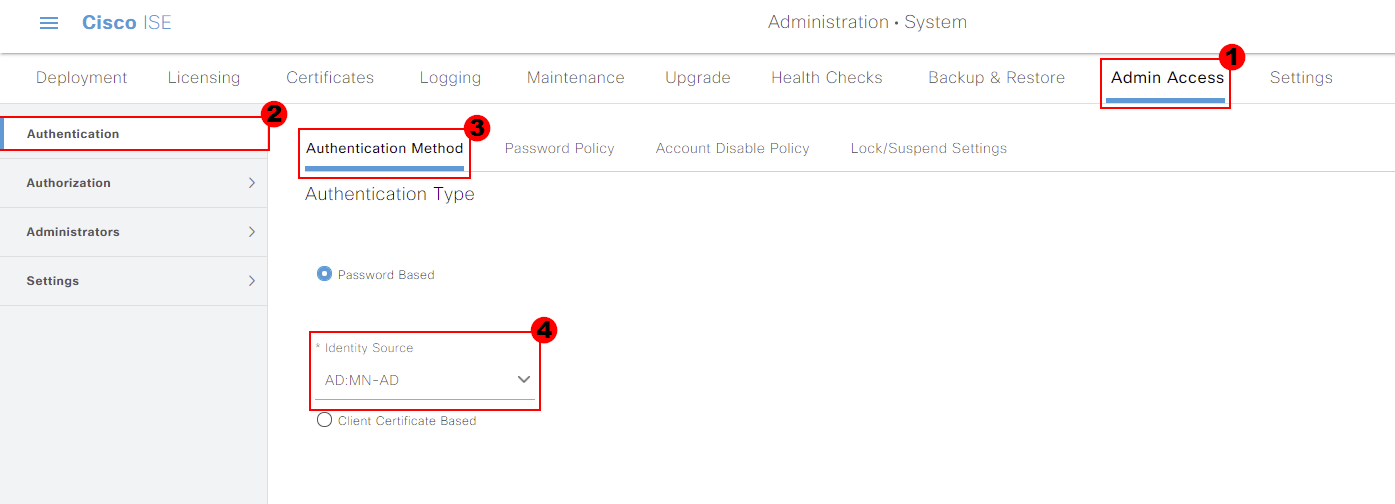
The first admin access configuration we’re going to amend is on the Authentication tab. Within here, we need to select Authentication Method.
Finally, we get the option to select an identity source. From the drop down, select your Active Directory. I’ll select MN-AD.
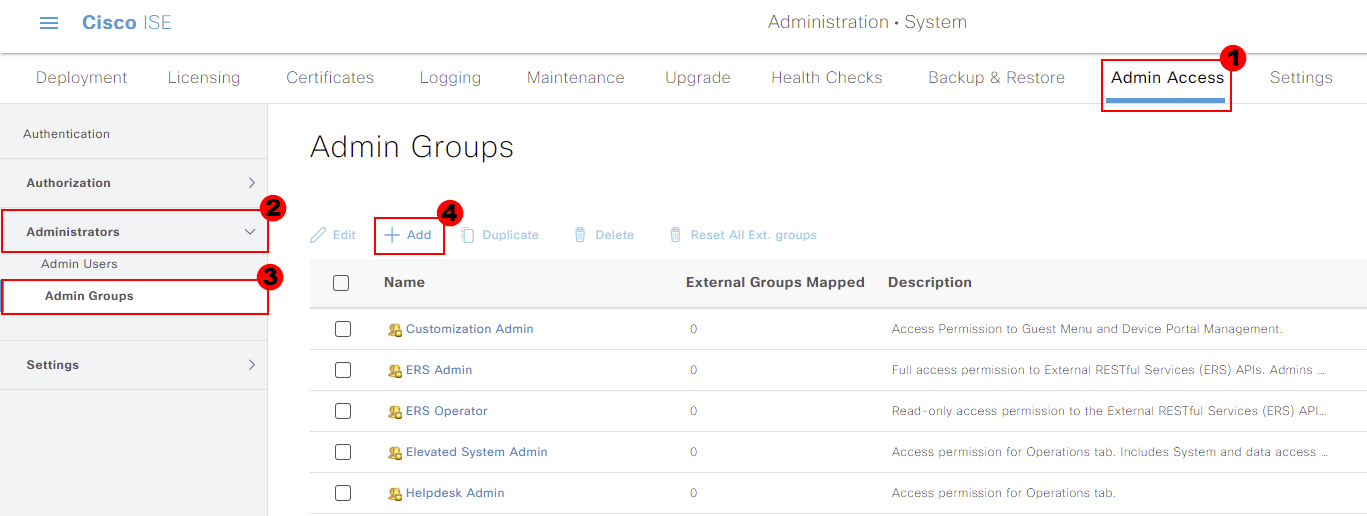
Next, we need to create an Admin Group for our Active Directory group to be mapped to within Cisco ISE. This can be found under the Administrators tab. Under the tab we need to select Admin Groups.
We can select Add to create a new group within ISE.
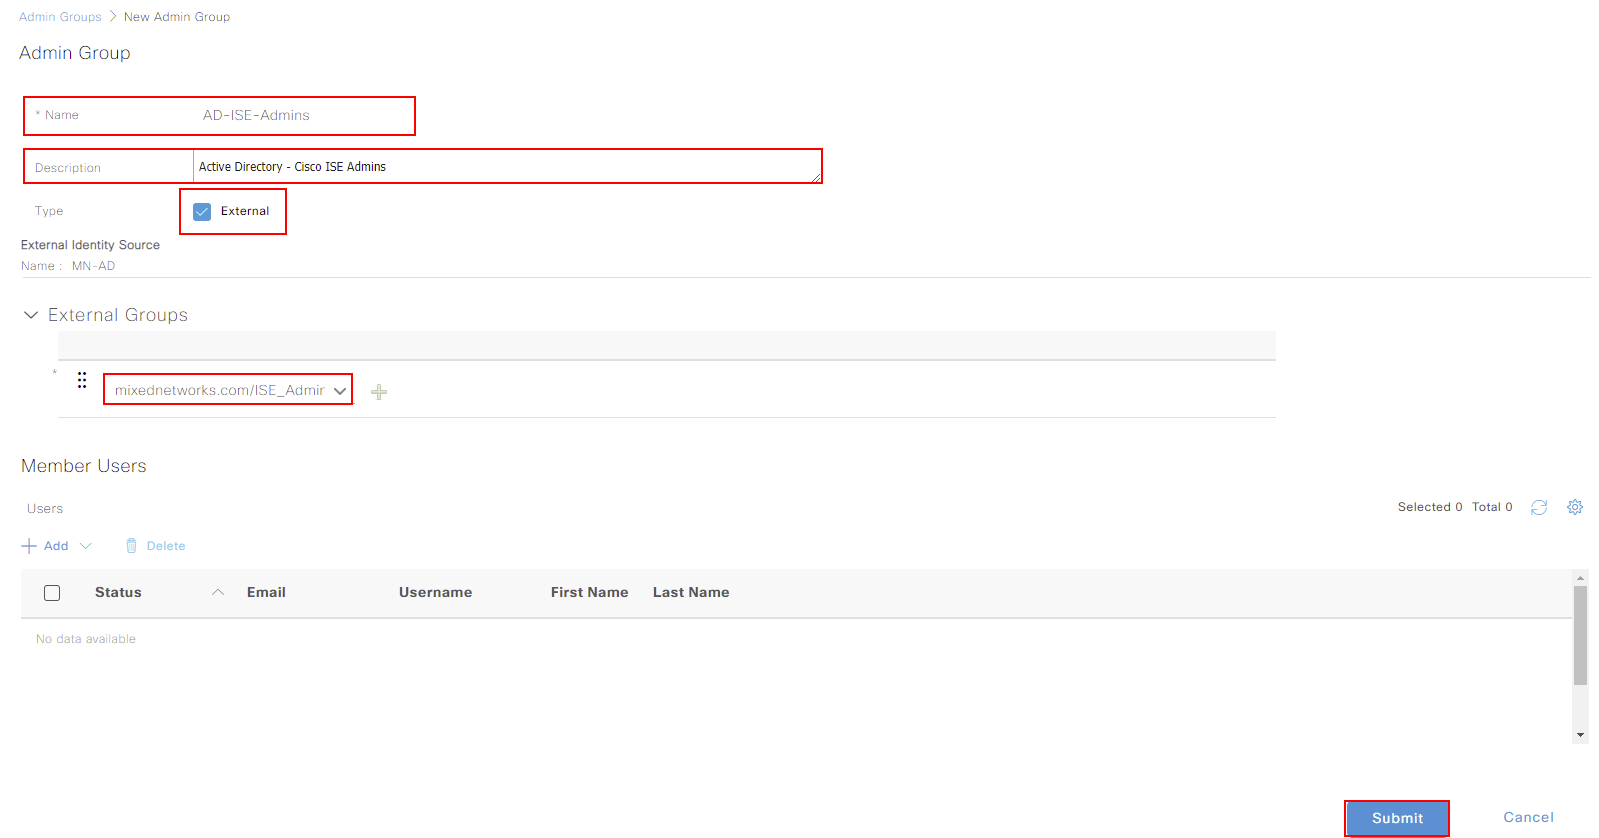
A small amount of configuration is required for our group. I’ll call mine AD-ISE-Admins so that it’s easy to understand what the group is for. We’ll also provide a quick description.
Because we’re mapping a group from Active Directory, we need to ensure we select the External tick box. We’re then prompted to select a group we’ve pulled through to Cisco ISE, from our directory. I’ll select the
group we pulled through at the start; ISE-Admins. Once the configuration is completed, press Select.
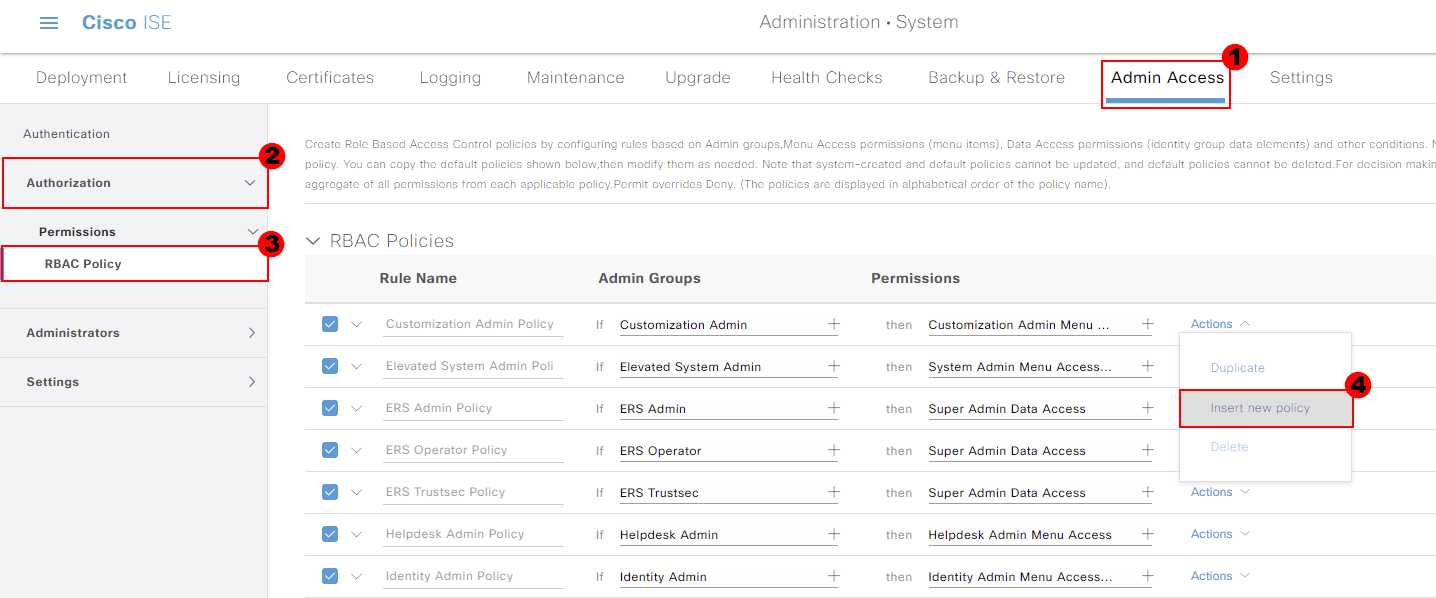
The final thing for us to do is create an RBAC policy. This allows us to map our group to permissions within Cisco ISE.
Our RBAC policy can be amended under Authorization. From here, select the cog next to an existing rule and select Insert New Policy.
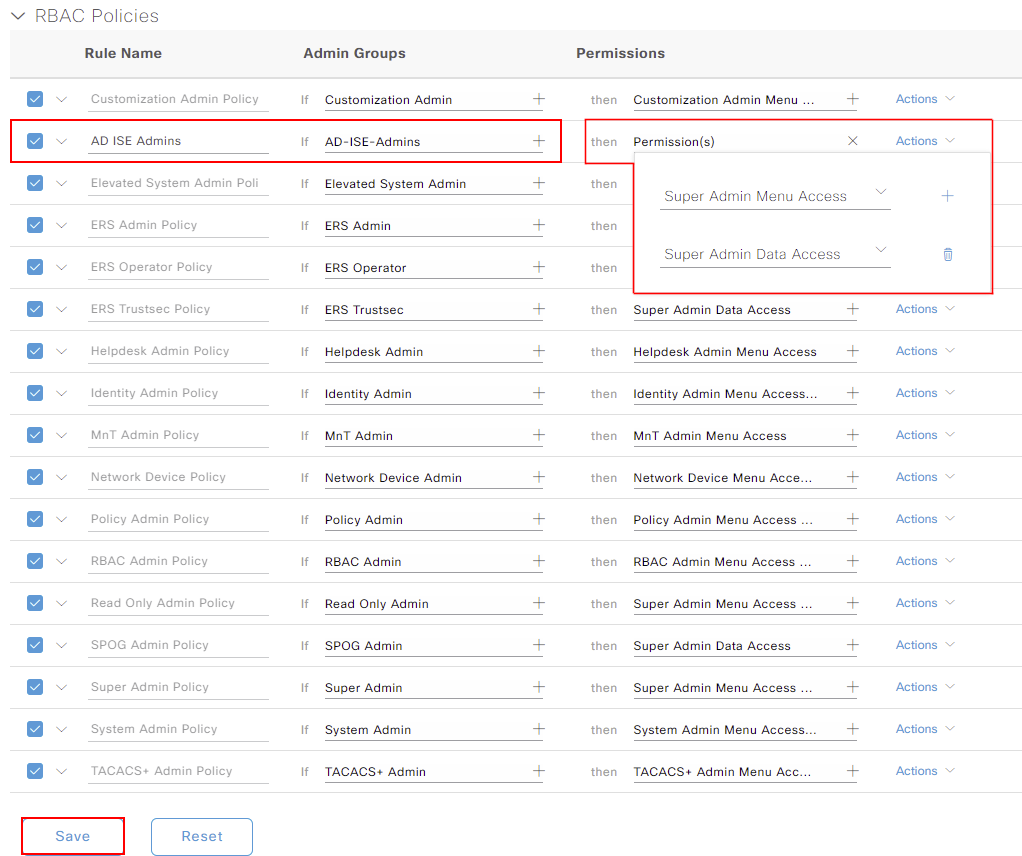
We’ll give our rule a name. I’ve called mine; AD ISE Admins.
The rule will be mapped to our internal group that we created; AD-ISE-Admins.
Finally. when we authenticate, we need to device what permissions to allocate. I’ll give users full administrator access to ISE by assigning both Super Admin Menu Access and Super Admin Data Access.
Once completed, press Save.
Our configuration is now completed within Cisco ISE. Anybody who is a member of ISE_Admins group within Active Directory will have access to Cisco ISE. They will then be assigned the permissions assigned above.
We’ll go back to the login screen of Cisco ISE. You’ll notice that we now have the option to select an Identity Source. Ensure your Active Directory is select. I’ll then login with an account that’s a member of ISE_Admins.
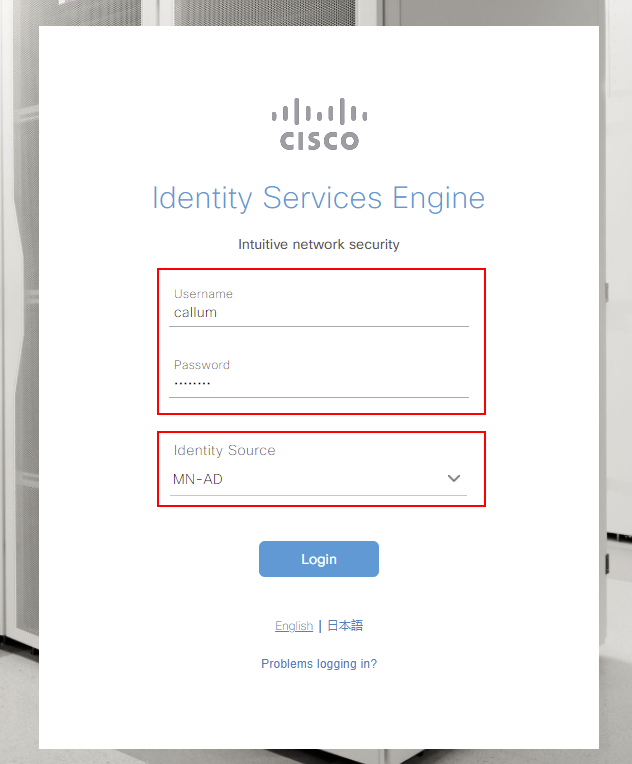
It’s worth noting that you can still log into Cisco ISE with local accounts. To achieve this, select Internal as your identity source. Along with this, all connections to the CLI of Cisco ISE will remain using local authentication.