Cisco Wireless Licensing Overview
In order to deploy Cisco wireless networks, you’ll need to license the APs and controllers accordingly. In this lesson, we’ll be taking a look at an overview of licensing requirements.
Exam Topic
2.0 Wired and Wireless Infrastructure
2.2 Determine logical infrastructure requirements such as WLC/AP licensing requirements based on the type of wireless architecture
Overview
Throughout this lesson we’ll be focusing on licensing APs associated to Cisco WLCs in Lightweight mode. The reason for this is that it’s rare to see autonomous APs in enterprise environments.
As we progress through the lesson, we’ll be taking a look at how the licensing model works for each firmware. From here, we’ll then take a look at how we can apply licenses to our controllers.
Cisco wireless controllers can run either of the following firmware, both of which have different licensing options;
The AireOS firmware can be found on the following series WLCs:
The IOS-XE firmware on the other hand can be found on the following series WLCs:
AireOS
There are two licensing methods available when using AireOS based controllers:
RTU:
The easiest of the two licensing methods is RTU. The licensing works on a trust basis with the user needing to accept an EULA.
This then provides a fast and flexible way to licence your WLC and APs.
Licenses still need to be purchase and proof of licenses will need to be provided to Cisco if you’re audited.
Applying RTU licensing:
In order to use RTU licensing on your controller, there are a few steps to complete;
1. Set the WLC to use RTU licensing.
To do this, navigate to:
MANAGEMENT > Software Activation > License Type
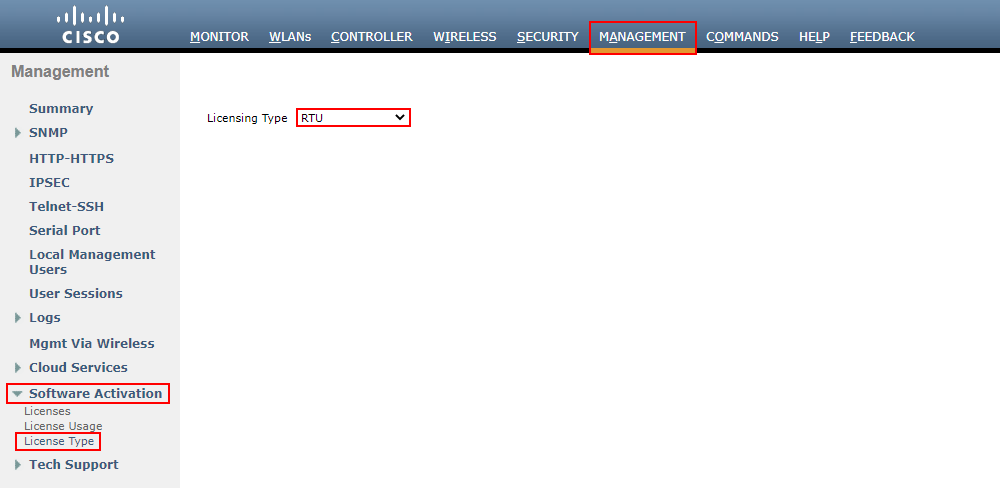
From here, set your Licensing type to RTU and press Apply.
2. Add RTU licenses to your WLC
We now need to add licenses to our WLC. We can achieve this by navigating to:
MANAGEMENT > Software Activation > Licenses
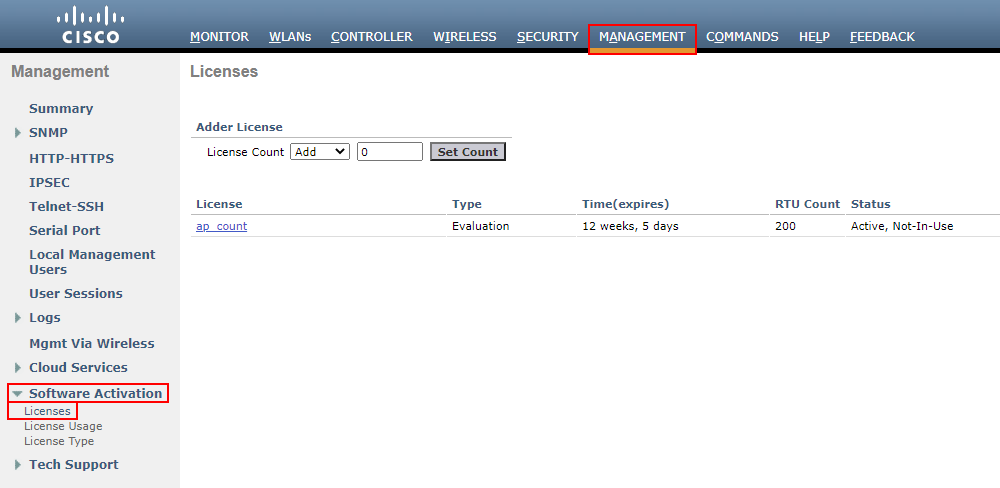
From here, select Add and enter the amount of licenses to add. In this instance, I’ll add 100 licenses to our deployment. We can then press Set Count to add these to our controller.
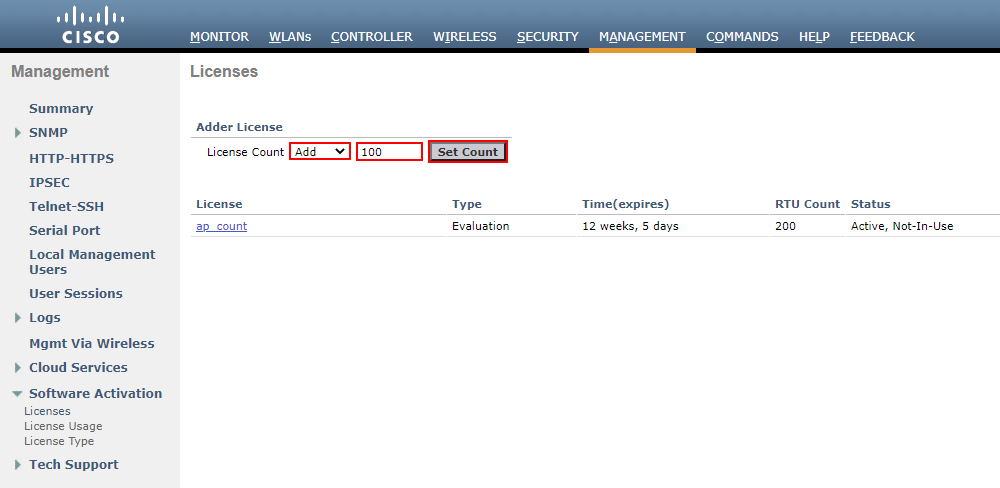
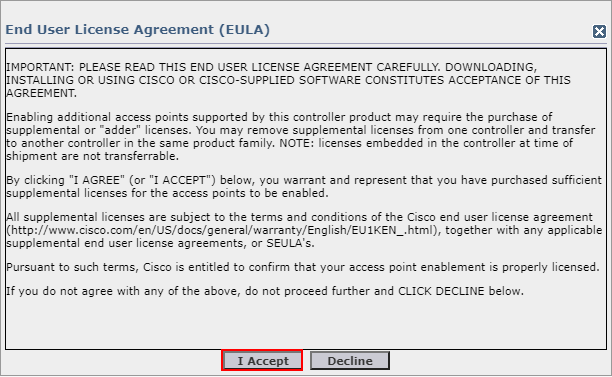
An EULA (End User License Agreement) will pop-up when adding licenses to the WLC. You will need to accept this every time licenses are added.
Smart Licensing:
Smart Licensing is used when you want to simplify licensing across your enterprise. It allows you to centralise all your licenses into a pool that can be used by multiple WLCs when required.
Cisco’s strategy for the majority of their product lines is moving towards smart licensing.
Applying Smart Licensing:
There are a few more steps involved in setting up Cisco smart licensing.
1. Creating a Cisco Smart Account
First things first, you’ll need to create a Cisco smart account if you’ve not got one already. This can be achieved
here.
2. Set the WLC to use Smart Licensing
In order to use smart licensing, we need to enable it on our controller. This can be achieved by navigating to:
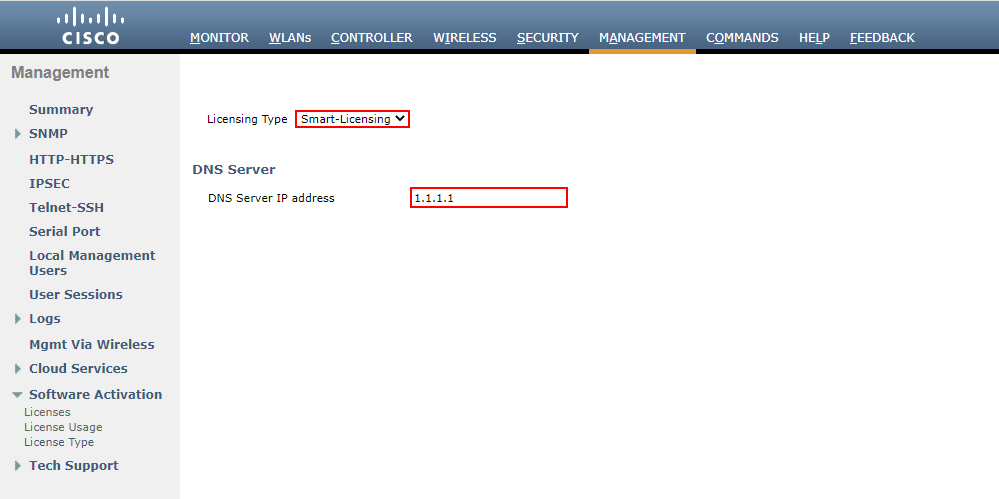
MANAGEMENT > Software Activation > Licensing Type
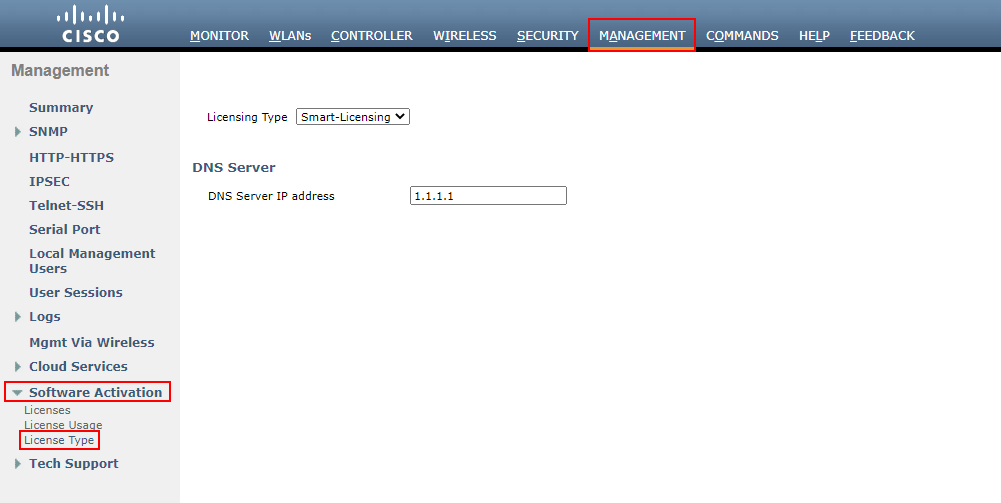
From here, set your Licensing Type to Smart-Licensing.
We then need to set our DNS Server IP address that can be used to reach the Cisco licensing portal. In this example, I’ll use 1.1.1.1. From here, we’ll Apply the settings.
NOTE: Changing our WLC to smart licensing will require a reload of the WLC.
3. Register the WLC using Cisco Smart Account
The final thing for us to do is register our WLC to the Cisco smart licensing portal. The WLC authenticates itself with the cloud portal using a Token-ID.
We can register the WLC by navigating to:
MANAGEMENT > Smart-License > Device Registration
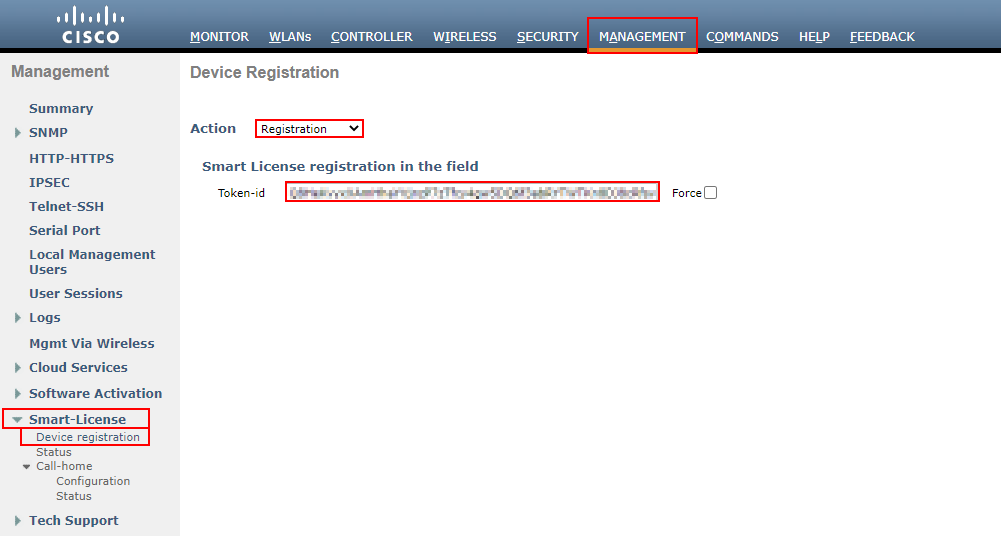
Here, we we’ll set our action to Registration. Next, we’ll enter our Token-ID that can be obtained from our Cisco smart account.
Note, the controller will require access to tools.cisco.com via TCP/443.
IOS-XE
Unlike AireOS, there’s only one method of licensing available on IOS-XE:
Applying Smart Licensing:
There are a few more steps involved in setting up Cisco smart licensing.
1. Creating a Cisco Smart Account
First things first, you’ll need to create a Cisco smart account if you’ve not got one already. This can be achieved
here.
2. Navigate to the Licensing section
As smart licensing is the only option available on IOS-XE, we don’t need to enable anything first.
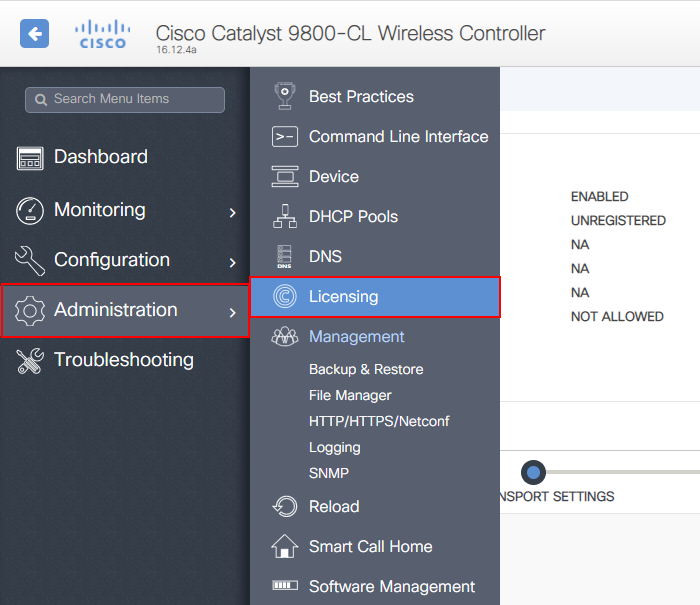
As such, we’ll navigate to the licensing section of our wireless controller:
Administration > Licensing
3. Configure Transport Settings
The first thing we need to do is tell our wireless controller how to reach the Cisco licensing portal.
There are two options for this:
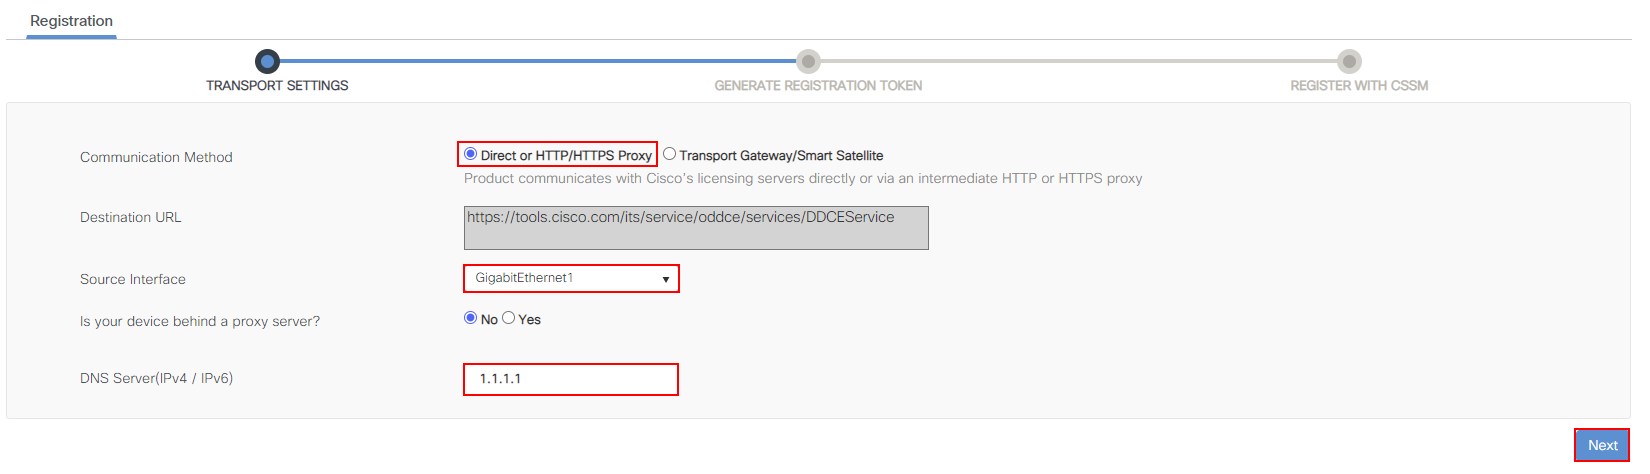
In this example, I’ll configure our controller to talk directly to tools.cisco.com via HTTPS.
The preferred interface to access the URL in my example is via GigabitEthernet1. In addition, the controller is not sat behind a proxy server.
Finally, the controller will resolve tools.cisco.com via the DNS server 1.1.1.1.
Once completed, we’ll continue with the registration by pressing Next.
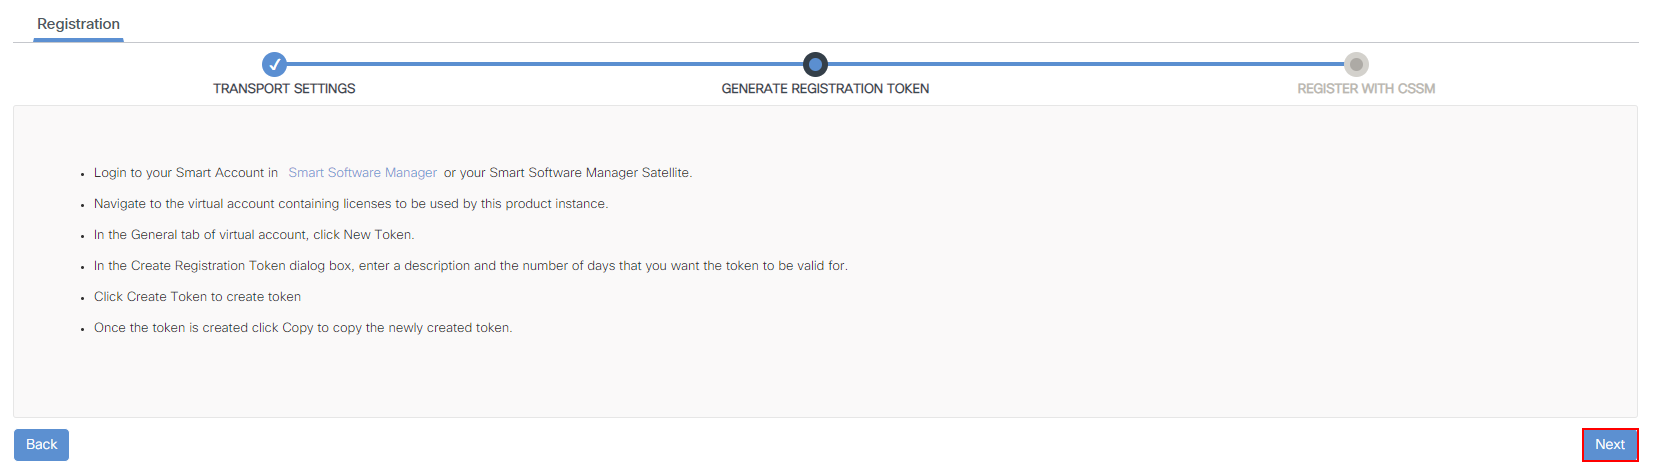
4. Generate Registration Token
The controller will then guide us through obtaining the Token-ID
required. We’ll simply press Next.
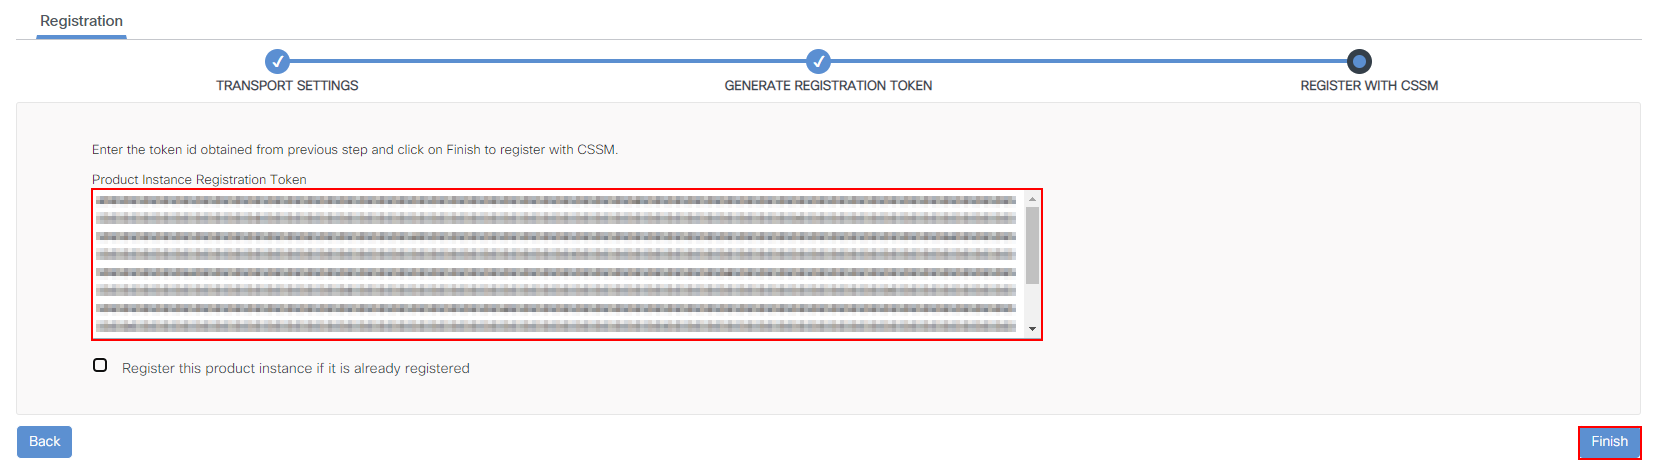
5. Register controller with Cisco Smart Licensing
Finally, we’ll past the Token-ID
obtained from our Cisco smart licensing account and press Finish. Once completed, our wireless controller will then attempt to register with the portal.